
Leather Axe Sheath Tutorial - Part 2
In Part 2 of my tutorial on How to Make an Axe Sheath I’ll be covering the glue-up process, stitch hole punching and the first part of edge finishing. If you are on this page, I’ll assume you have already been to Part 1 here, if not – you’d better check that out first or you’ll be in a state of confusion for the next several minutes! Let’s get on to it.
Jump to Parts 1 or 3:
Part 1 Part 3Prepping to Glue the Axe Sheath
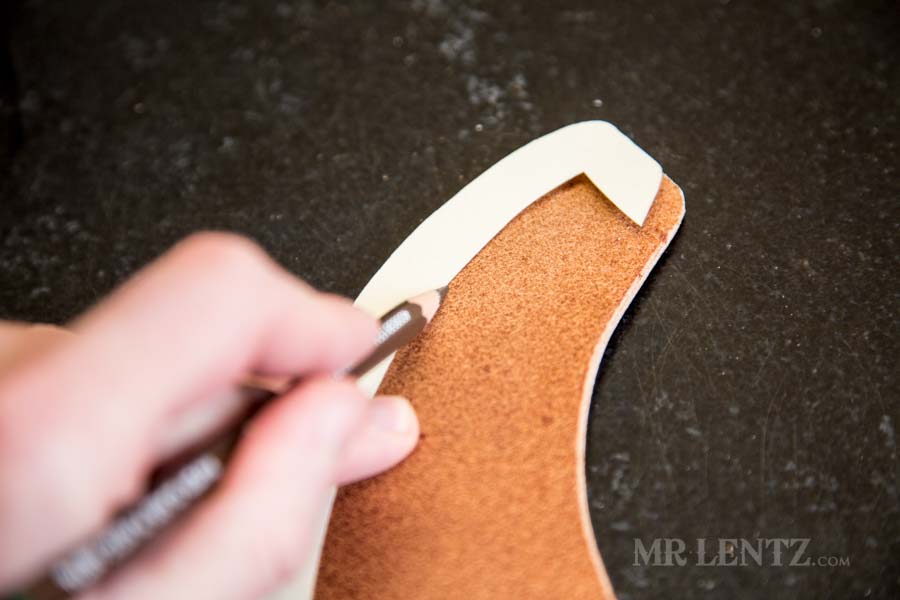
We left off with prepping the retaining strap a bit and now let’s continue by prepping the sheath to glue up. Above I am marking where the welt will sit on the sheath. I take the welt template and lay it on the flesh side of the front half of the sheath. The front half is the side we have already run the stitch groover on, just flip that over and put the template on, lining it up with the edge. I do it this way because I cut the front of the welt out roughly oversized, so we can’t just lay it on, we need to mark the inner edge of it on the sheath using the template.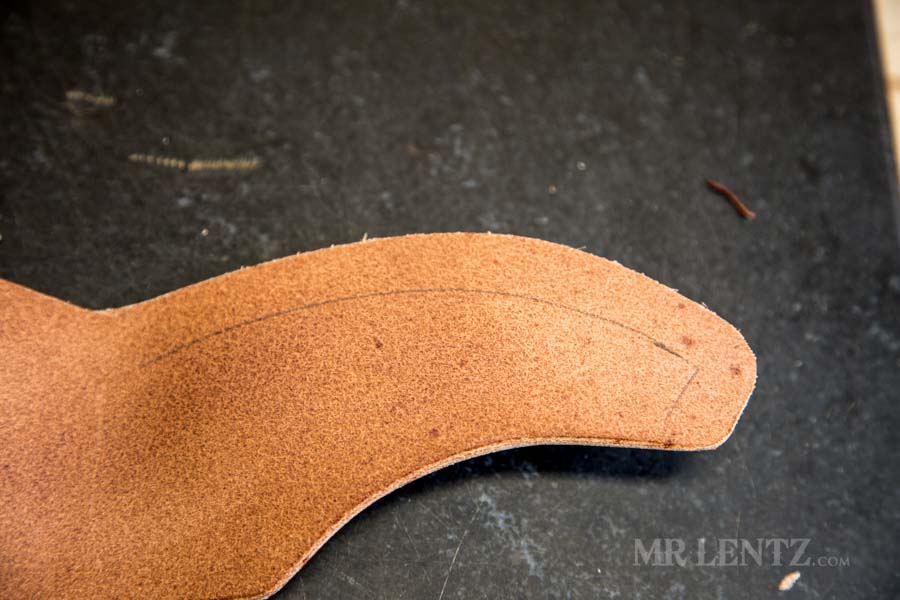
Above is the welt line marked on the sheath front flesh side. When I go to sand and glue, I will know where to do it! Also – how to line it all up with the welt.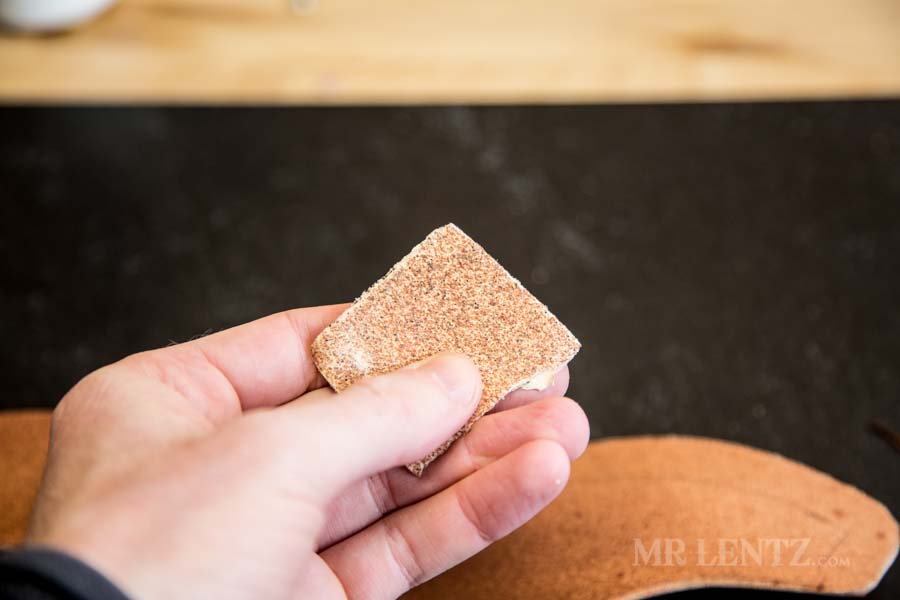
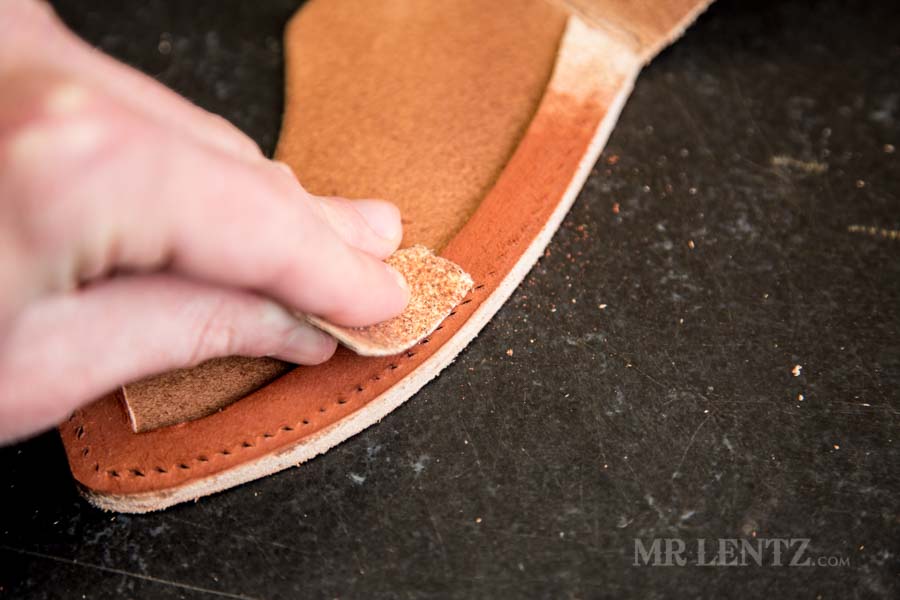
I use a 60 grit sandpaper, fairly rough, to mar up the leather where the glue will go. This helps the glue grip the leather better.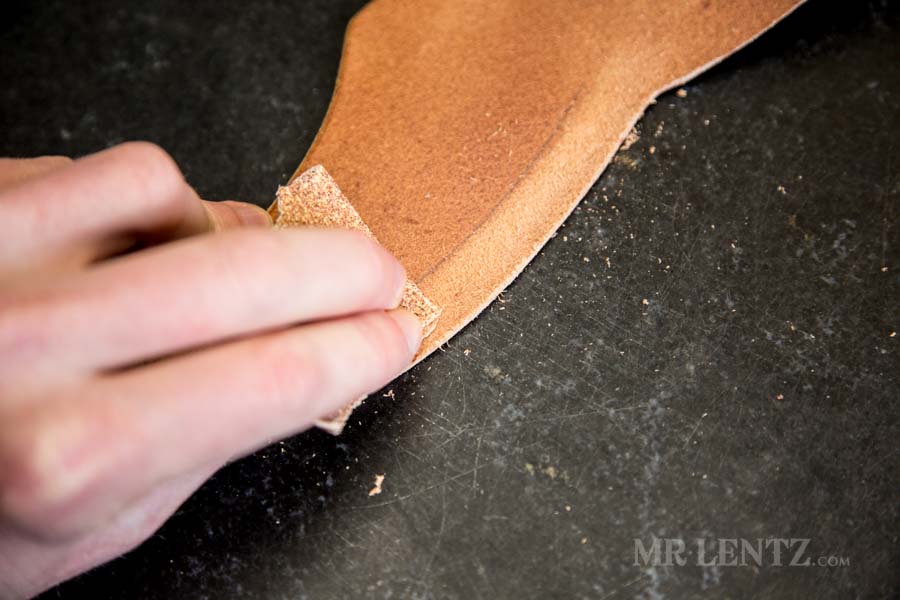
You only need to roughen the area where glue will be laid down for the welt. It is not always necessary to do this on the flesh side of leather, but this particular piece was fairly smooth so I gave it a go.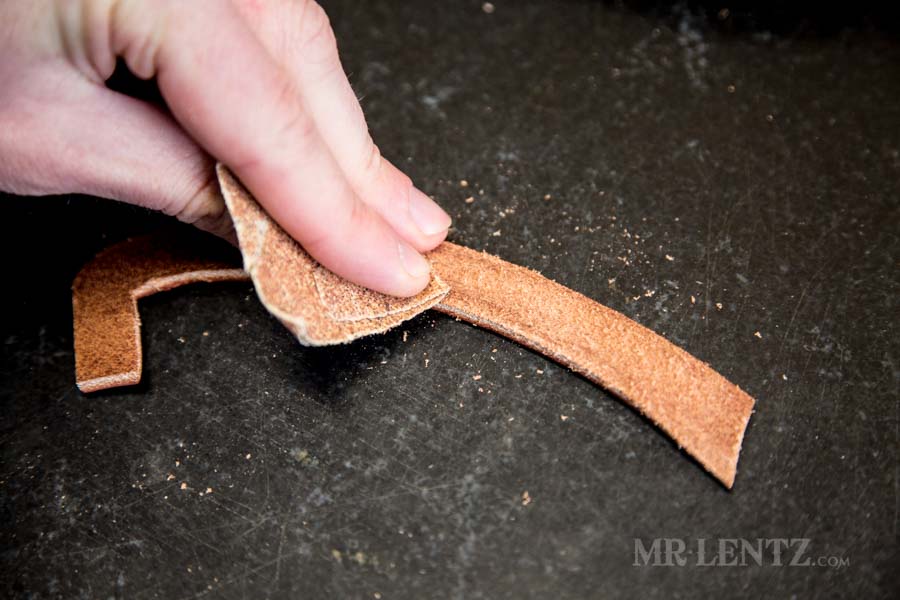
You should rough up the welt too just a bit.
Gluing the Welt

There are a plethora of leather glues out there to choose from. I prefer kinds with minimal to no VOCs, volatile organic compounds. Many traditional leatherworkers swear by some contact cements that give off some pretty nasty fumes, I just have no interest in working with potentially harmful chemicals in the shop.
After experimenting with a wide range of glue, I found this simple and unassuming one from Fieblings to fit my needs. It’s a white glue kind of like elmer’s, spreads easily, and dries within a short period of time. It does not smell, and most importantly it holds the leather together quite well when you are punching holes and stitching. I am not relying on the glue itself to hold a finished project together, merely I need it to hold tight for the stitching phase. Another great thing about this glue – sewing needles pass through it easily, which was not the case with many other varieties.
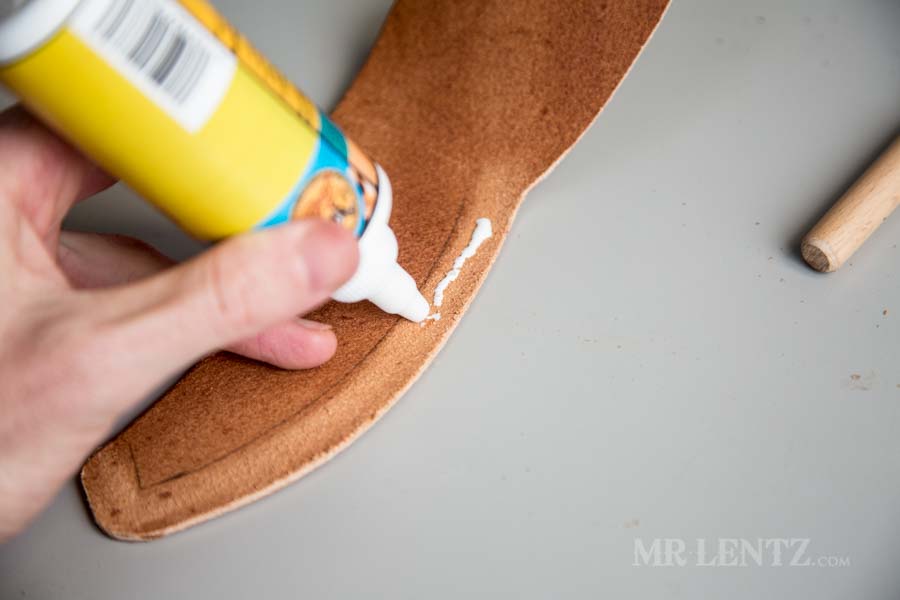
I put a small line down the center of the glue area on the sheath. You don’t need much here, in fact less is better. Too much and the glue will push out of the edge when clamped and create problems when edge dyeing.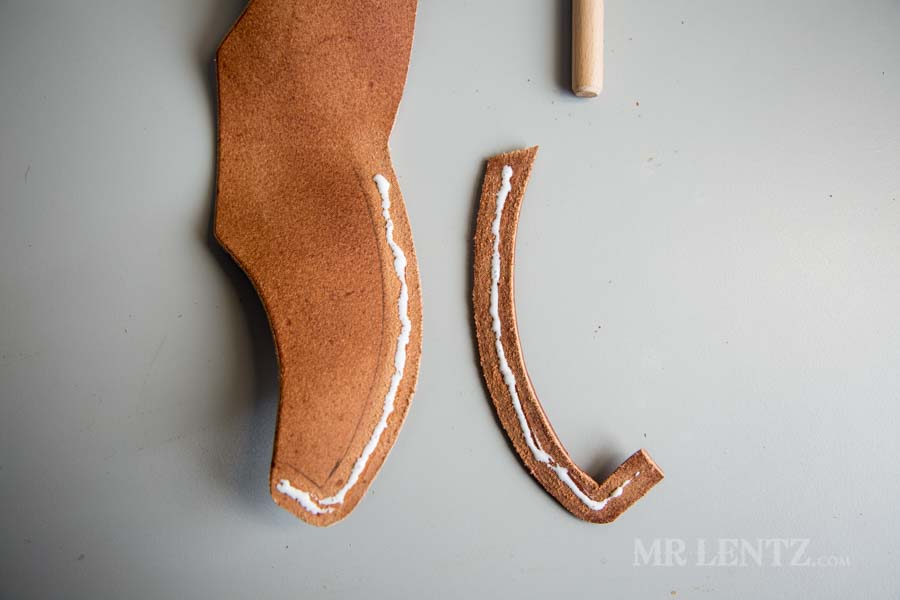
I place glue on both the sheath body and welt. This is typical for contact cement, though on this specific brand of glue I have not yet experimented if gluing both sides was truly necessary.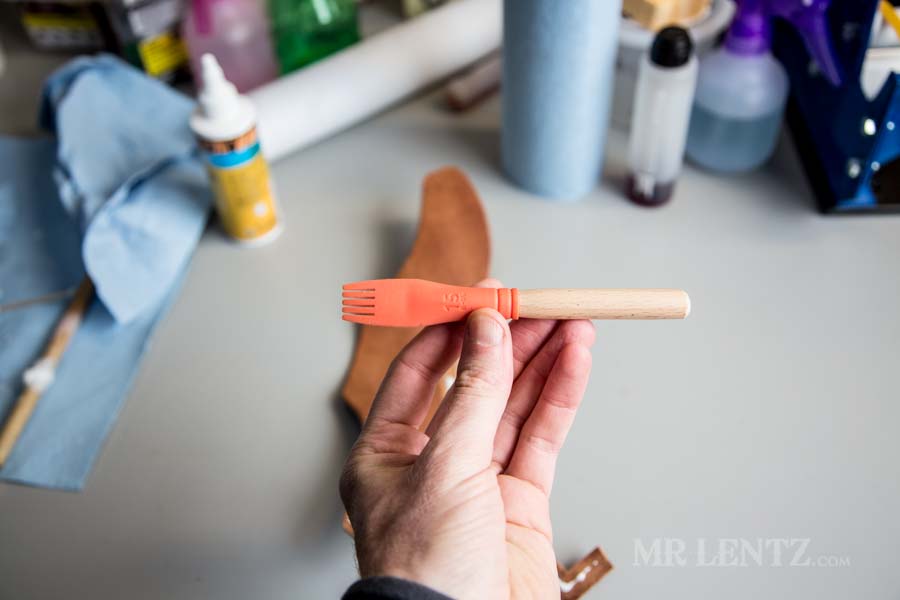
This is a simple glue silicon glue spreader, it’ll make your life seem like a dream.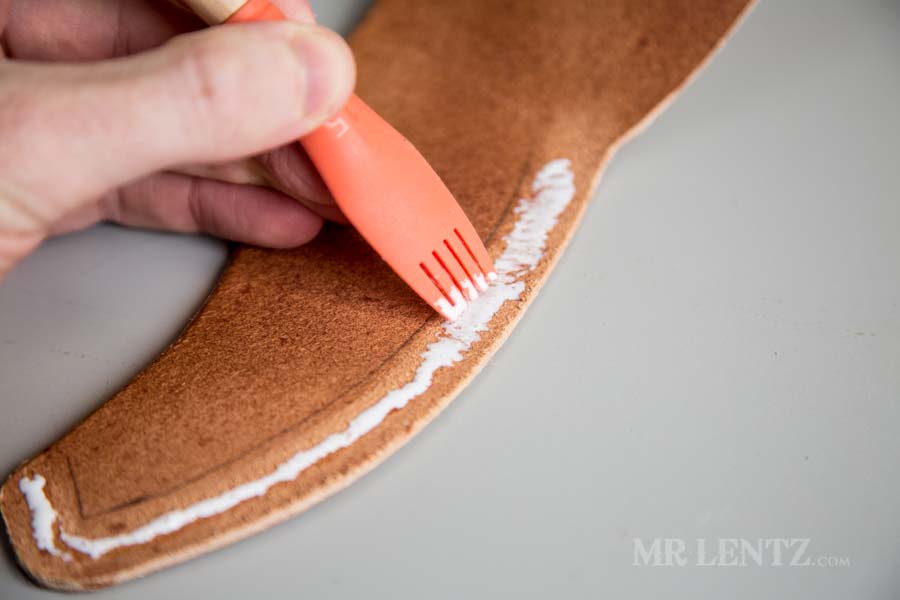
Using the spreader I brush the glue to cover 70% of the glue area surface, leaving space near the edges to prevent it from running.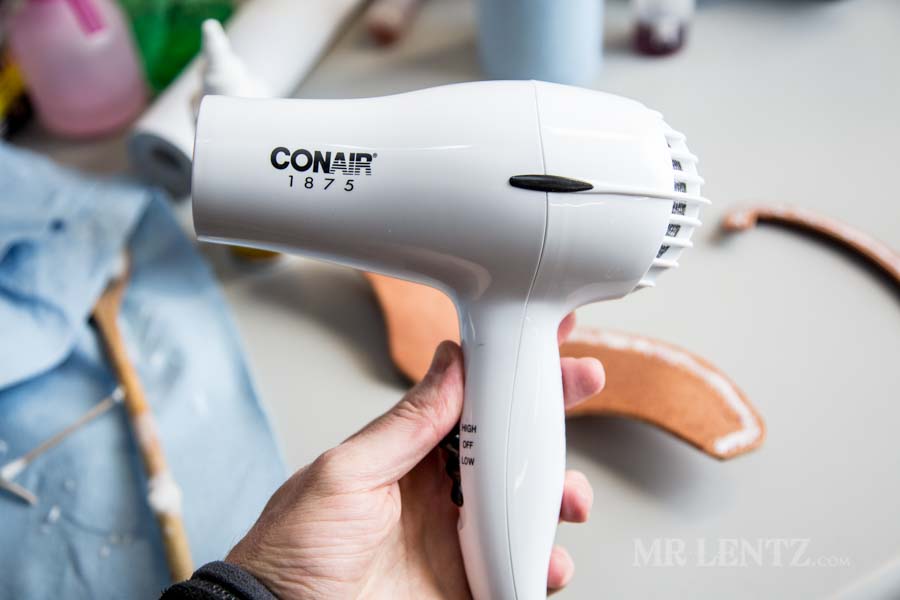
If you have a small hair dryer, they are great for curing glue and drying your dog off after running through mud puddles all day.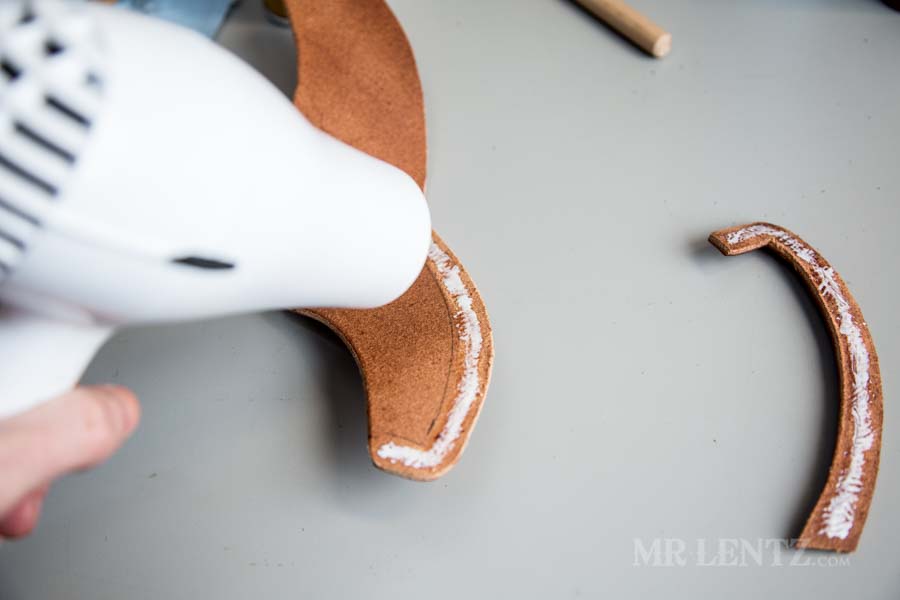
I use the hairdryer for 10 to 20 seconds on the glue to help harden it up slightly. This does two things – it makes the pieces less slippery when you go to push them together, and second it helps keep any glue globs from running out to the edges when you press the leather together.
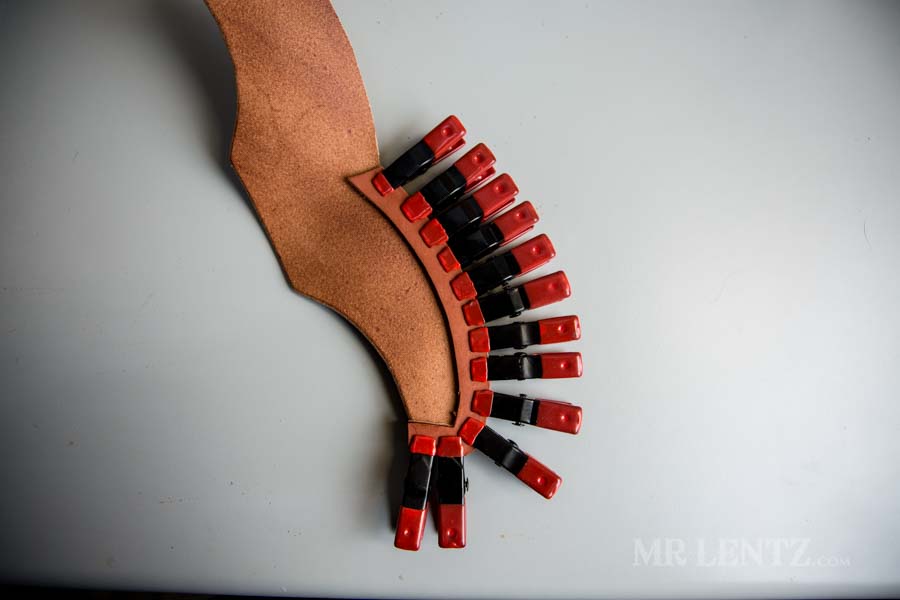
Using a set of mini rubber tipped clamps I clamp the welt to the entire edge. Next is where patience is a virtue. If you are not in any rush, let this dry overnight and you’ll be in good shape. If you like to live a riskier life, wait about 1.5 hours and hope for the best. I waited about 2 hours and things turned out good with only a minor loosening in one spot.
Prepping For Final Glue Up of Sheath
Using the Japanese skiver bevel side down, I blend the top end of the welt down to a point. When you go to fold the body of the sheath over the welt to sandwich it, things will work much better if you skive that spot just a bit.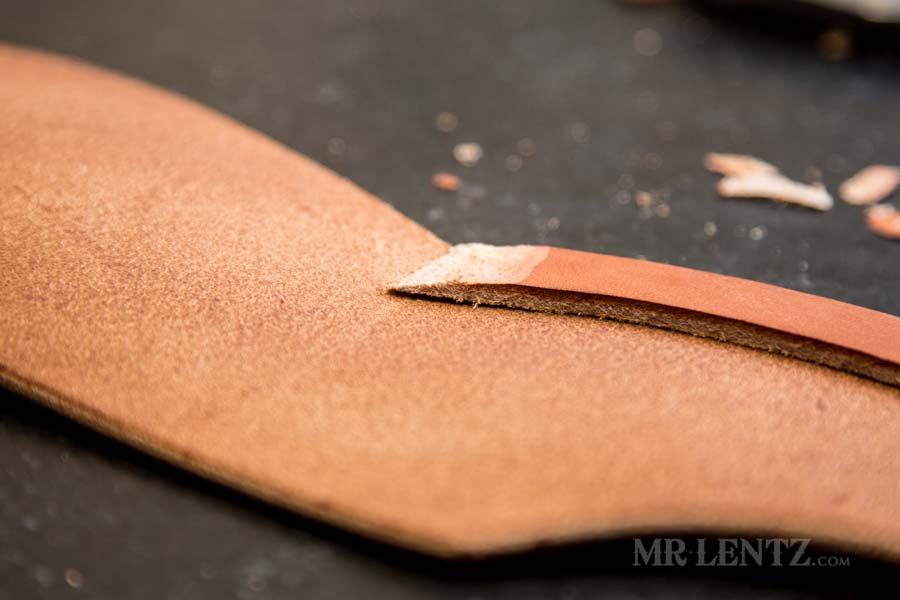
Above is another angle on what you should be after with the skiving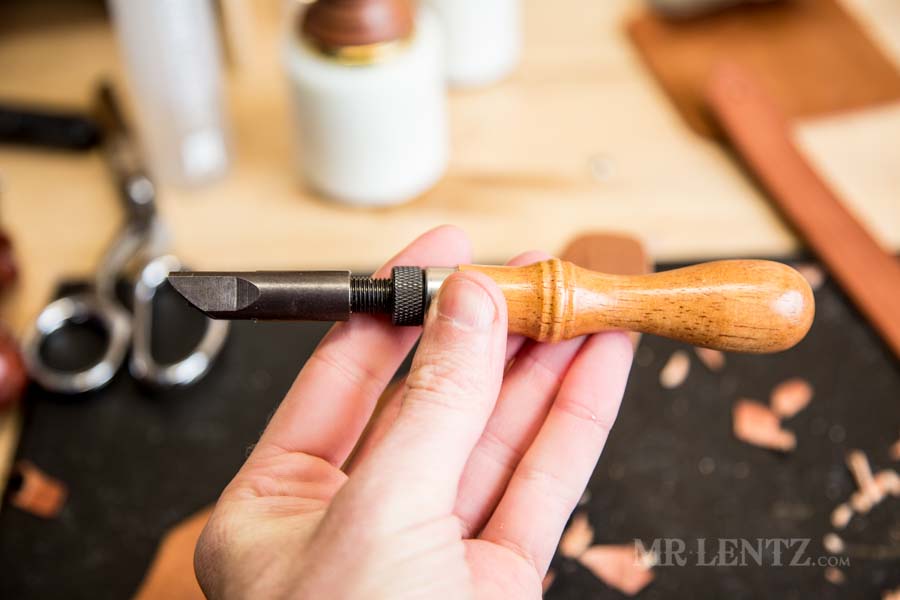
Above is a v-gouge and I found a very useful part of the sheath to use it on.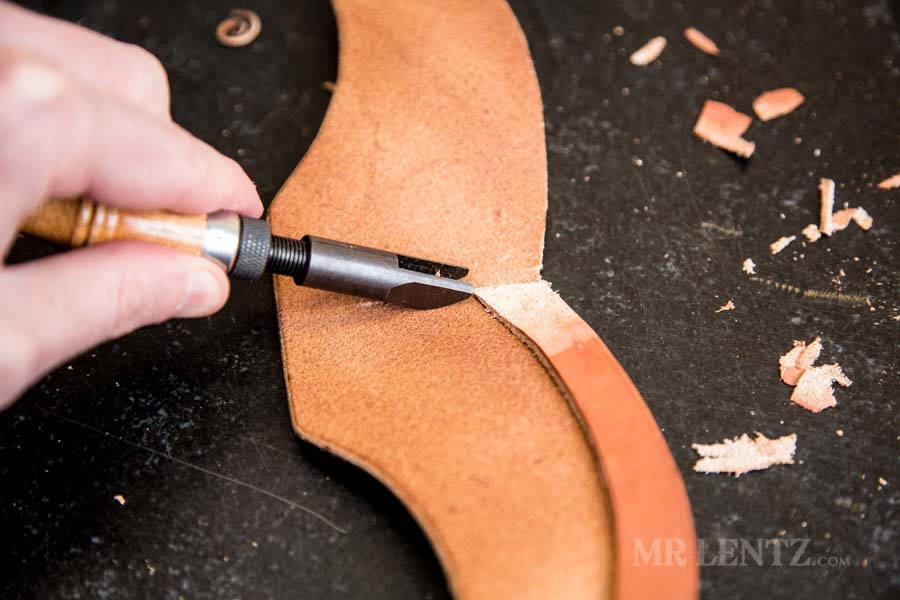
The sheath will need to be folded over and glued to the welt, but this is pretty thick leather – so it’ll want to fight ya! Using the v-gouge from the middle of the fold out to the edge I remove a bit of leather. This allows the folding to be a piece of cake. The devil is in the details they say.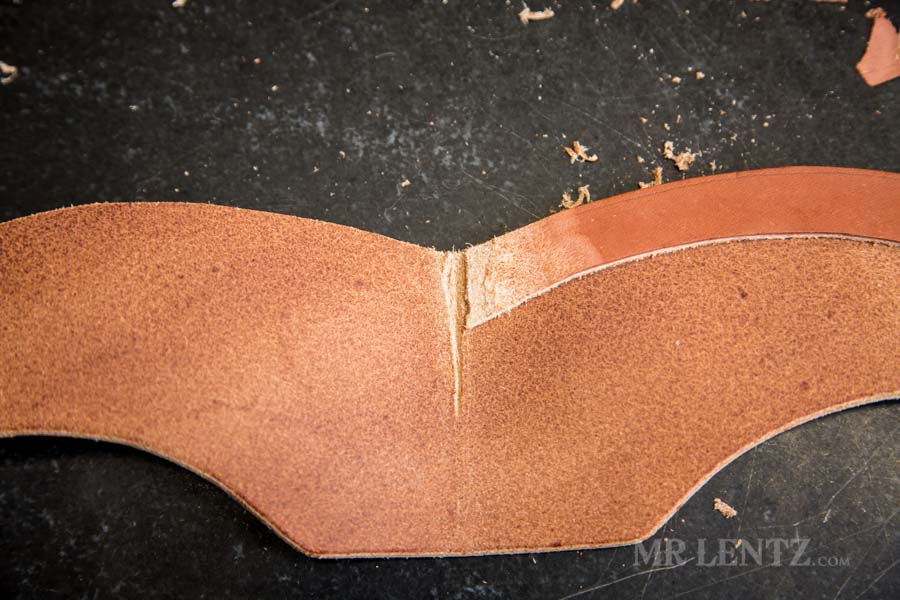
You only need to go about 15% in depth, and you can test fold as you go to see how things are working.
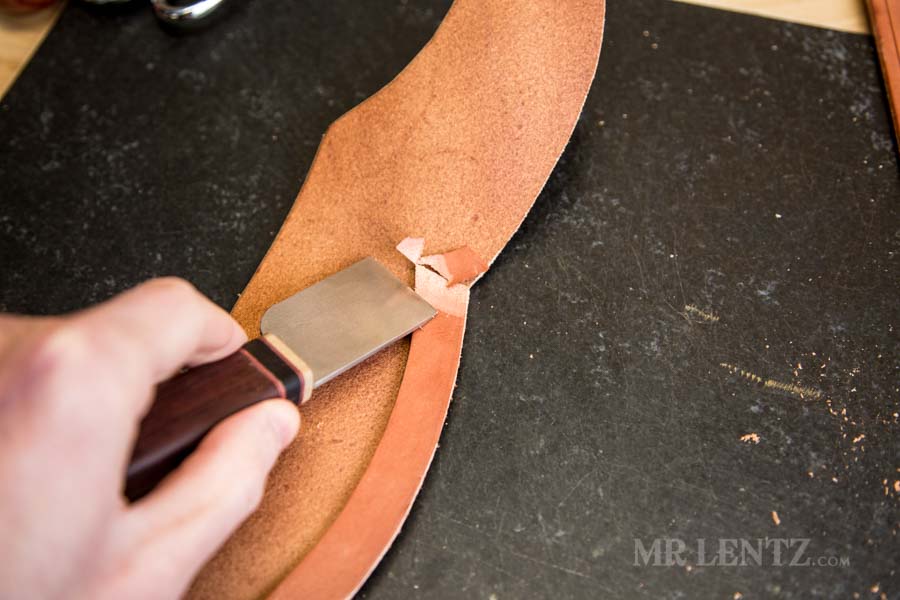
Turing the sheath over I noticed part of the welt hangs out. Using the sharpened box cutter I cut it closer to the edge, but not all the way – I can sand it close later.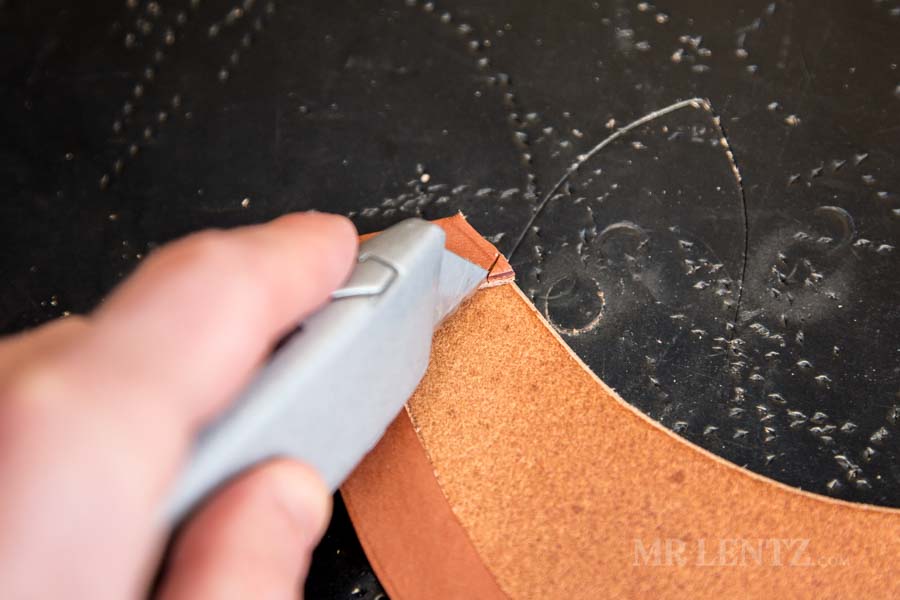
On the inside of the sheath the welt has a sharp corner right where the axe blade will need to fit through. I like to cut this part off at an angle so that it doesn’t catch the axe blade.
Punching the Stitch Holes
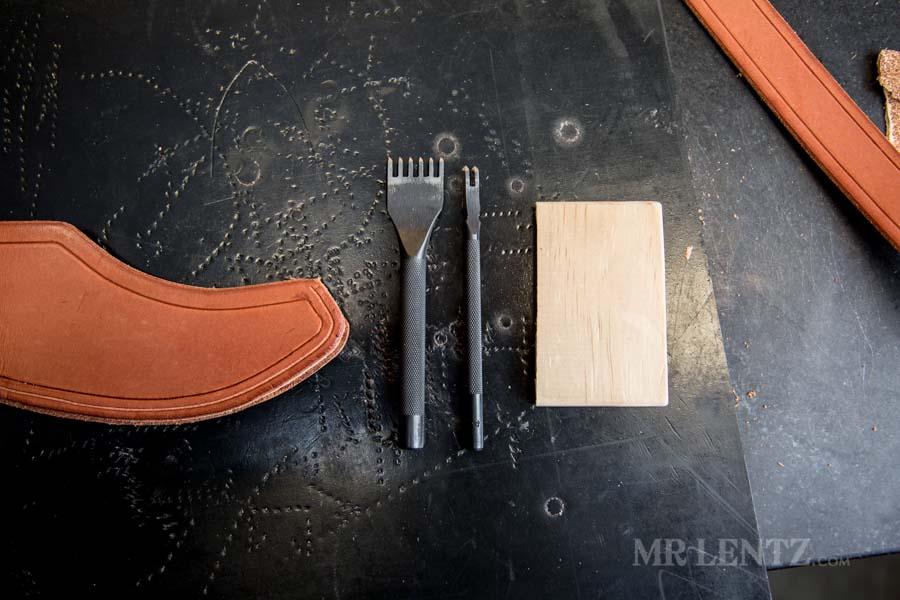
Next, it’s time to punch the stitching holes. Never use a hole punch. Never drill. Never laser cut the holes. The key to a stitch that will stand the test of time has a lot to do with how the hole is punched. The traditional way is to use a diamond shaped awl. This does not remove any leather, it merely punctures the leather in the shape of a diamond. Doing it this way allows the leather to have a solid grip on the thread, which makes for a very tight stitch and one that will hold together even if a stitch breaks years down the road.
To take things one step further, a diamond chisel set will do the same thing, except you have the advantage of perfectly placed stitches and aligned stitch holes. I use a combination of new-school and old school on this sheath because you can’t punch through all layers of the axe sheath using the chisel set. If you do find a long enough chisel set and try it… you will curse the effort to remove said chisel from three layers of 8-9 oz. leather!
Starting at the lower edge I place the two pronged chisel at the end of my stitch groove on the sheath. At this point we are only punching holes on the front side of the sheath. Striking with a weighted mallet, make sure to hold the chisel perpendicular to the leather. Angled holes will cause much trouble down the road.
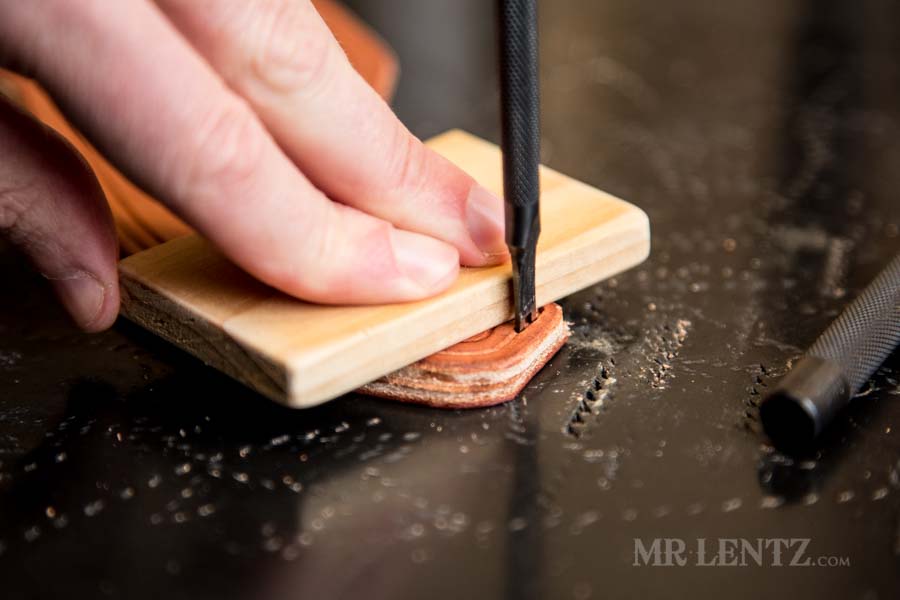
Using a slim piece of pine I sanded smooth, I can easily apply pressure to the leather while pulling on the chisel to get it out of the leather.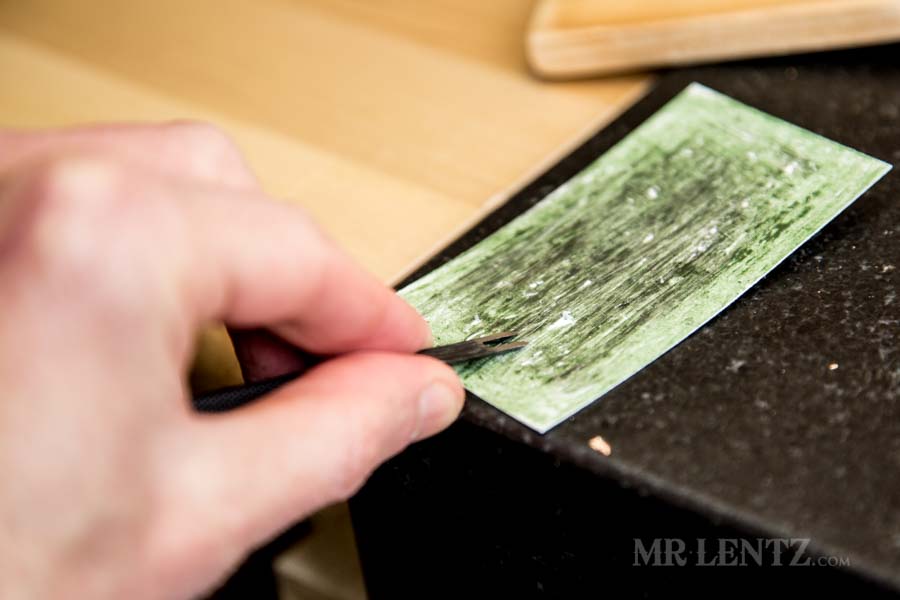
Sometimes I find that my chisel sticks too much for my liking. To help with that I run the tips on my stropping card going back and forth about 6 times on every edge I can reach. Polishing it up in this way seems to help the chisel in being removed from the leather.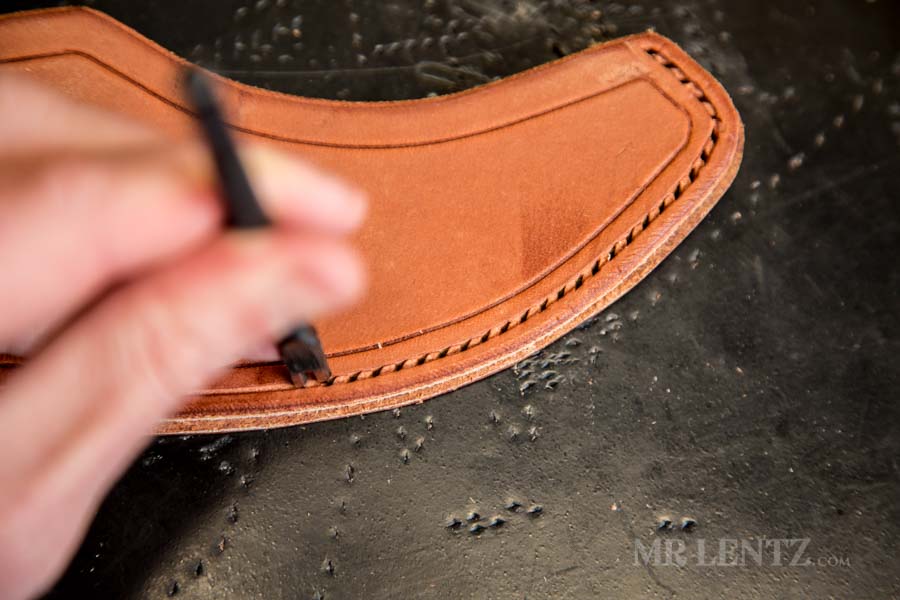
Go ahead and work your way around the axe sheath until you get to the end of the stitch groove.
Trimming the Front Edge
Once you finish up with the diamond chisel (only punch the holes on the front side of the sheath), use a rolling razor, scissors or box cutters to trim the edge of the welt closer to the body. Careful not to undercut here, in other words keep your cutting tool perpendicular to the leather.

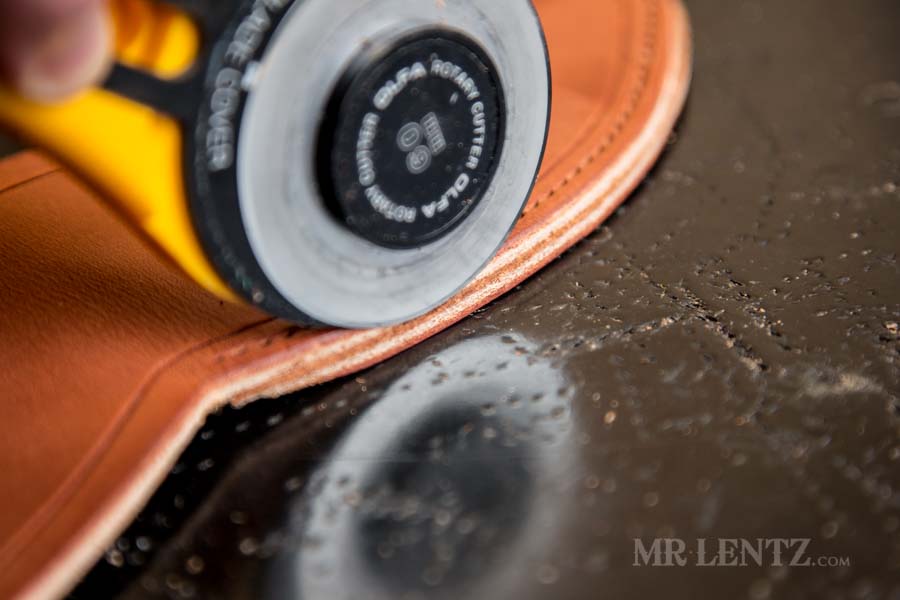
Next I take the sheath to the belt sander with a medium grit. I sand down the welt to be flush with the top layer of leather. Careful not to over-sand here, as it will cause the edge to be too close to our stitch line. The idea in this step is to create a good reference point to line up the backside to in the final glue-up stage.
I use the sander to round the edges a bit.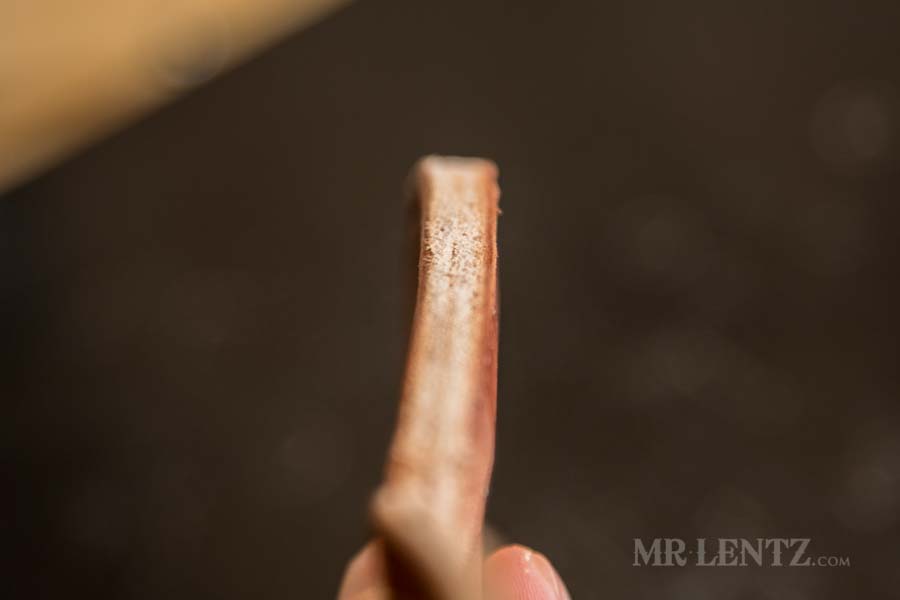
The edge should be flat, flush and at a 90 degree angle to the front.
Like this post so far?
I spend most of my free time creating tutorials like this to help those like yourself get into leatherwork and woodworking, or get better at it. If you'd like to support my efforts, consider checking out my handmade leather goods shop and purchasing a gift for yourself or a loved one. It's readers like you that help keep a small U.S. business like mine going strong, so -thank you!
The Final Glue Up of the Axe Sheath
Using a rough grit sandpaper I roughen up the welt where it will be glued.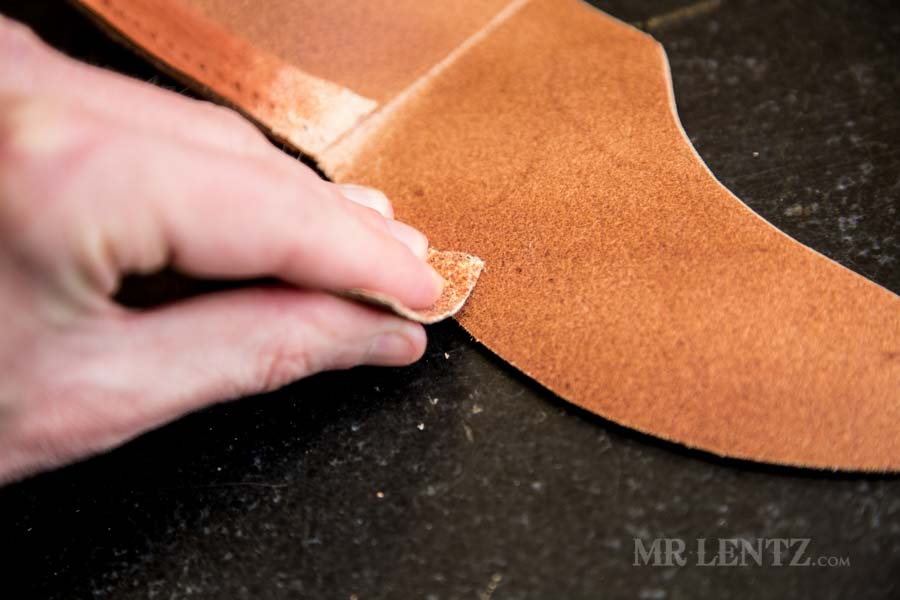
I also roughen the opposite side since the flesh side on this higher end leather is fairly smooth.
Spread a small glue line down the center of the welt and the opposite side, where it will be glued to.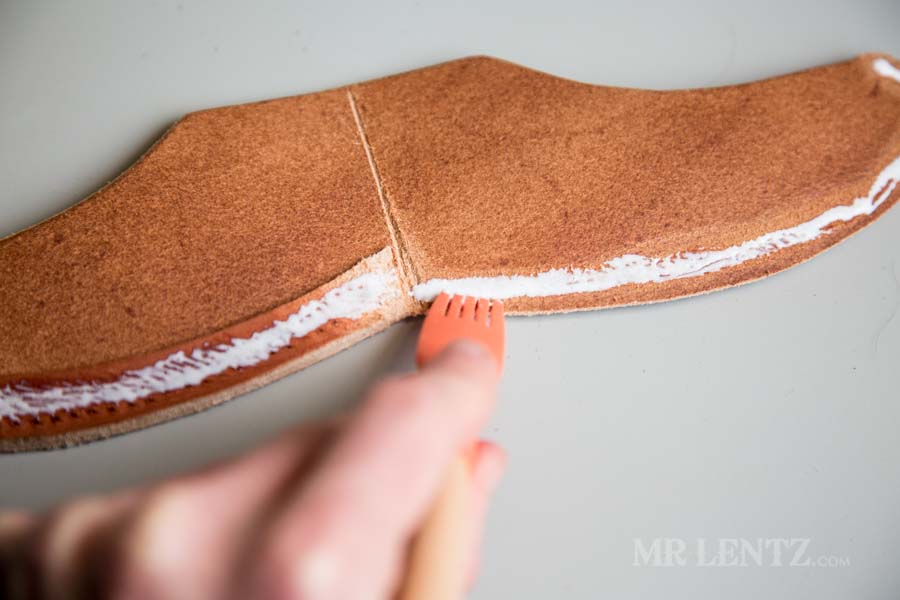
Using the spreader I even out the glue, but not too close to the edge.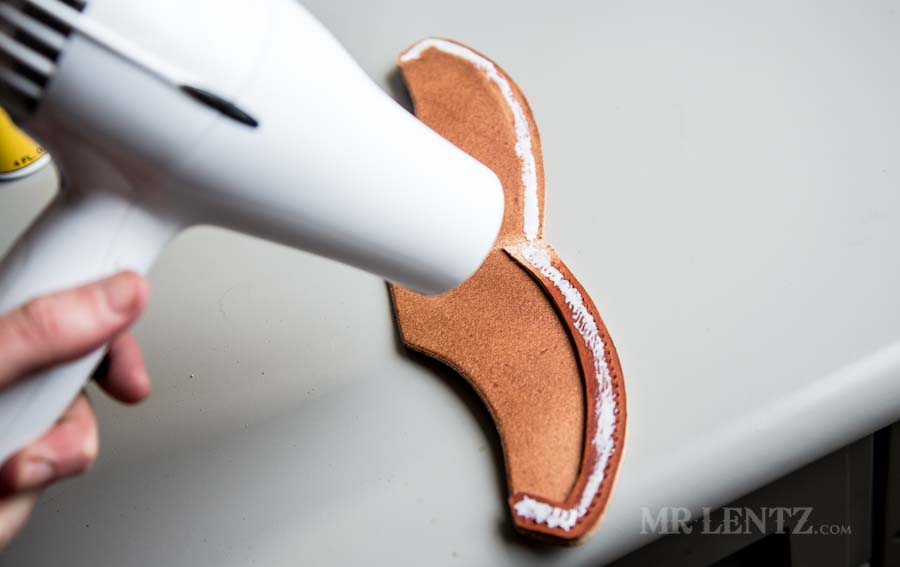
With the hair dryer on high, I cure the glue just a bit to make it less runny.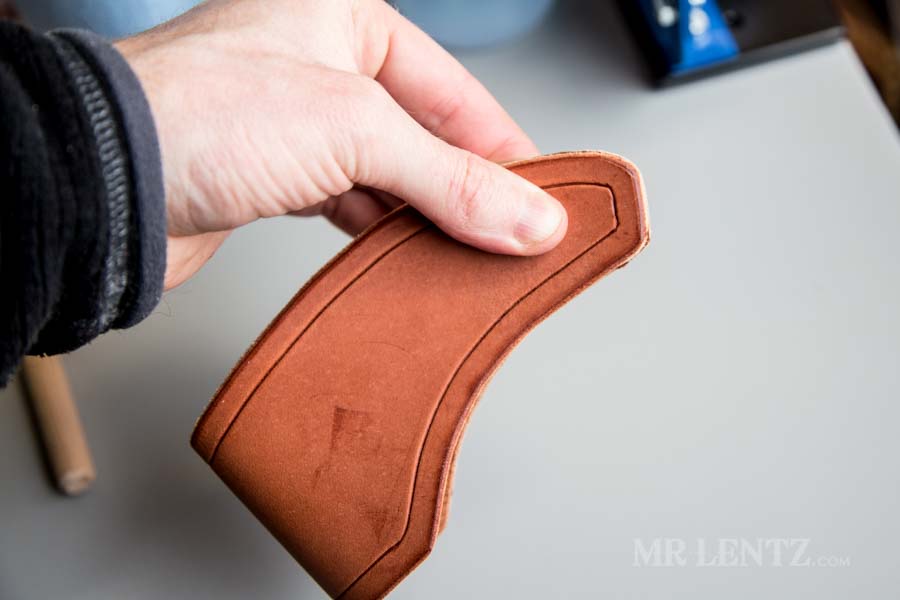
Very carefully I fold the sheath in half and line up the bottom edge first.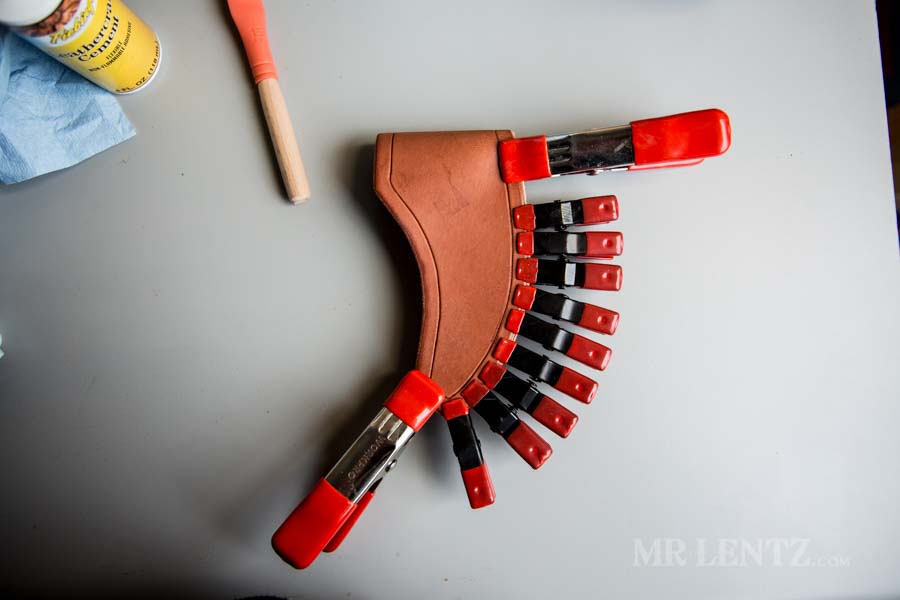
Slowly making my way around the edge I pinch and press it together followed by a small alligator clip. I like to use large clips on the ends where the pieces may be more likely to part ways with themselves.
Edge Preparation Before Stitching

Back to the sanding belt to sand down the back edge to be flush with the front and welt. Don’t use pressure here or you’ll get burn marks.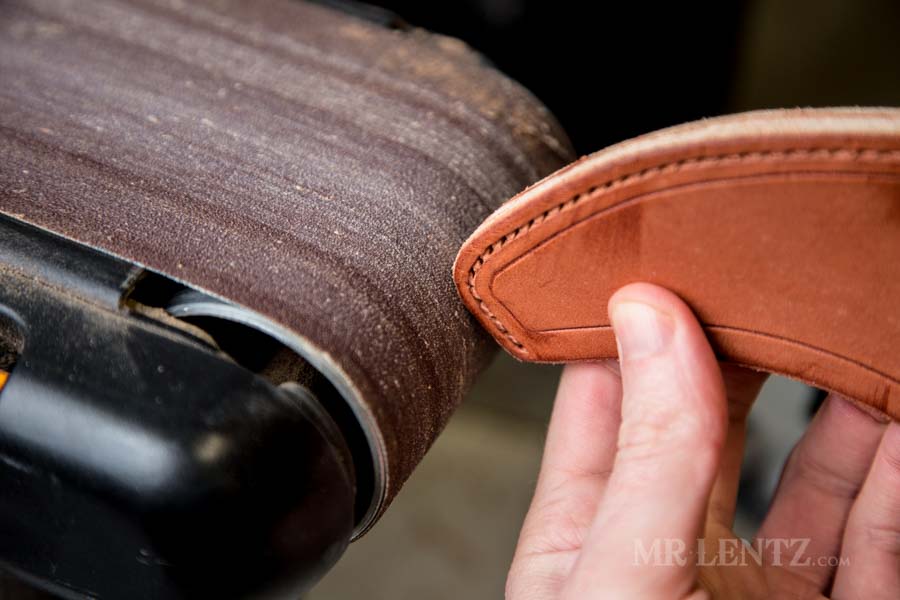
Rounding the edge to match the rest of the sheath.
Once fully glued and sanded, I can now cut the stitching groove on the backside. If you had done this at any point earlier, you may run into the problem of having that stitch line too close to the edge as compared with the front side.
I start just off the top end of the sheath and follow down around the bottom edge, ending slightly short.

Next I lightly dampen the edge on both sides of the sheath along the stitch line.
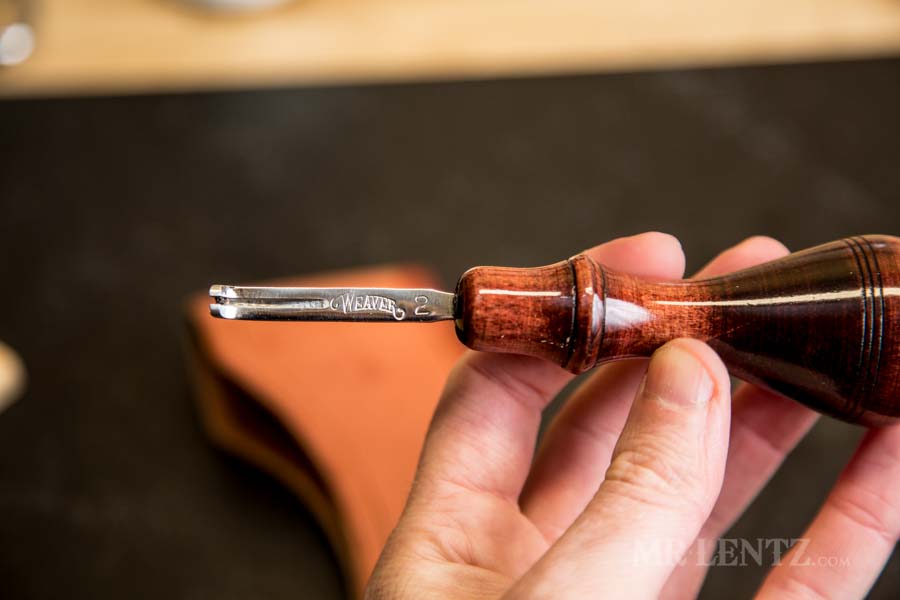
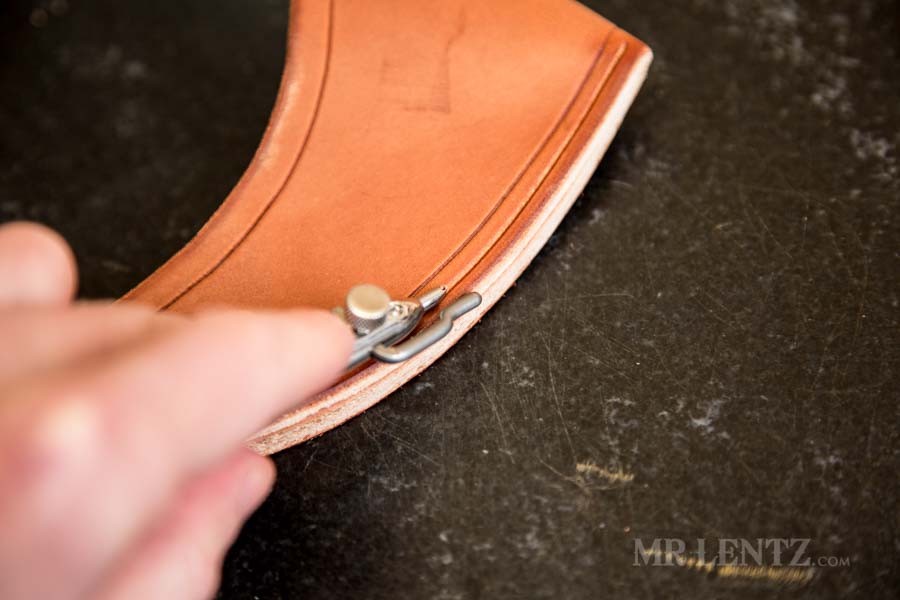
At this point a number 2 edge beveler is a good choice to round the edges along the stitch line.
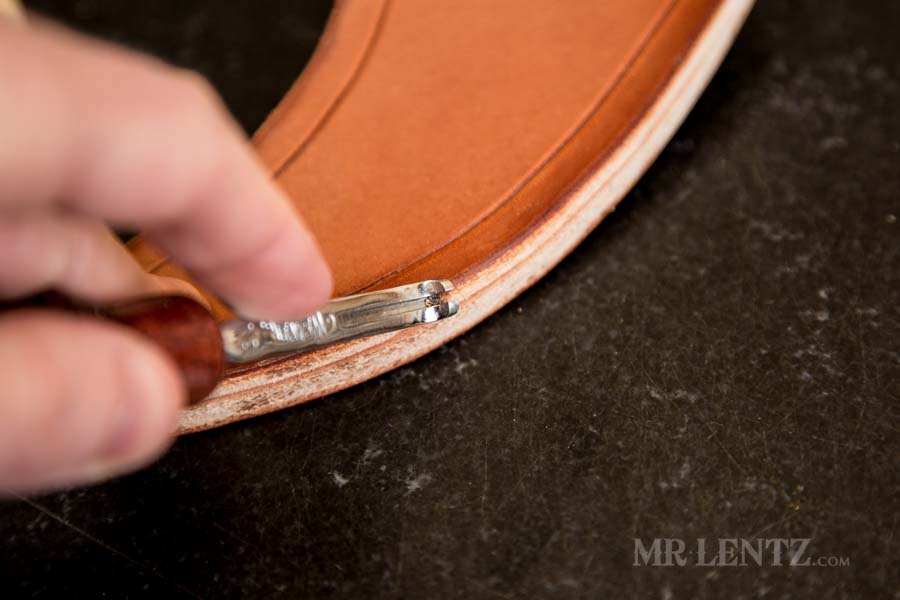
Use the beveler along the glued edges on the front and back.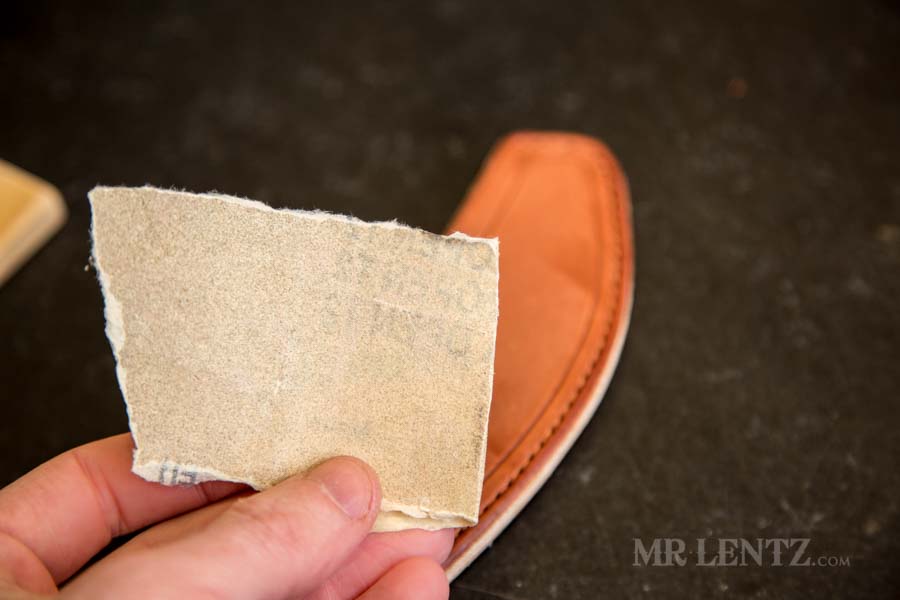
Now we can finally prep the edge for edge dyeing and finishing. There are numerous different ways to accomplish this task and it can get quite confusing for many. I think that different processes work for different people, so here’s my simple and refined take on things. Start by selecting a 220 grit sandpaper.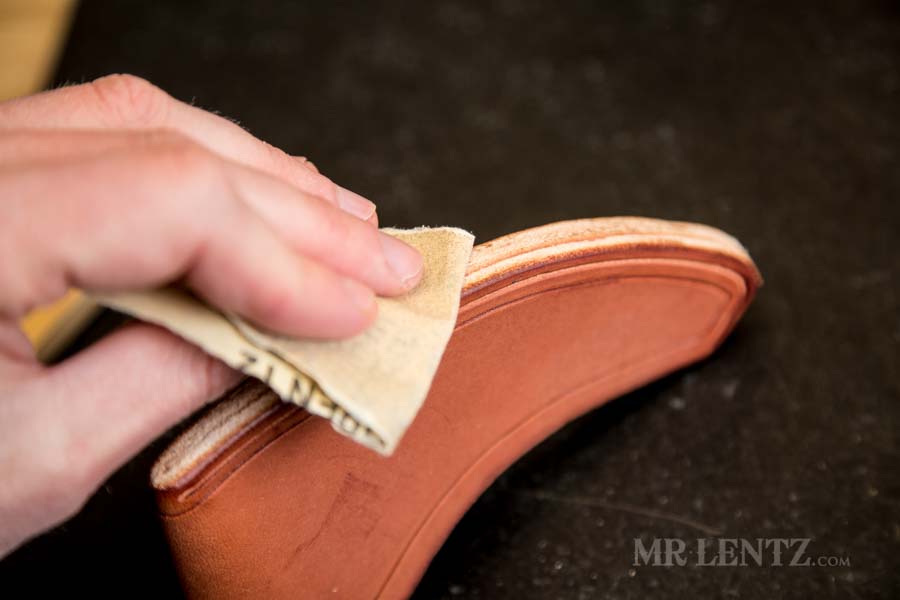
Sand all edges smooth using the 220 grit paper. Look for small bumps and divots to take out with the sandpaper. The more uniform the surface…the better the shine when all steps are finished.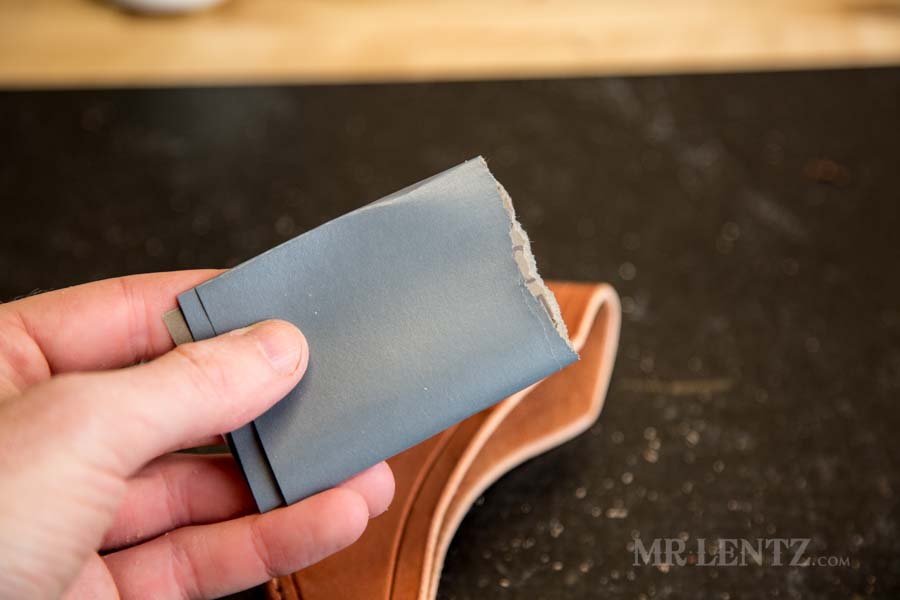
I then grab my 600 grit sandpaper and repeat on all edges. 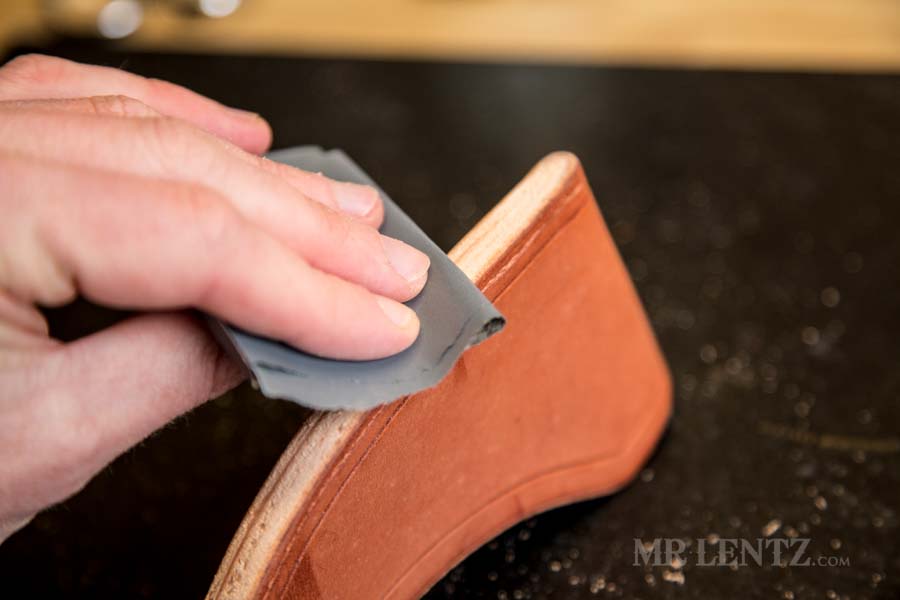
This paper wears out quickly, so keep using new parts of it. The edges will be very smooth at this point and you should have almost no frizzy leather fibers sticking out.
Edge Dyeing and Finishing Stage 1

At this point I like to dye the edges on my sheath. For this project I am using the Fiebling’s Pro Dye in chocolate color. It’s a spirit based dye and seems to work very well. 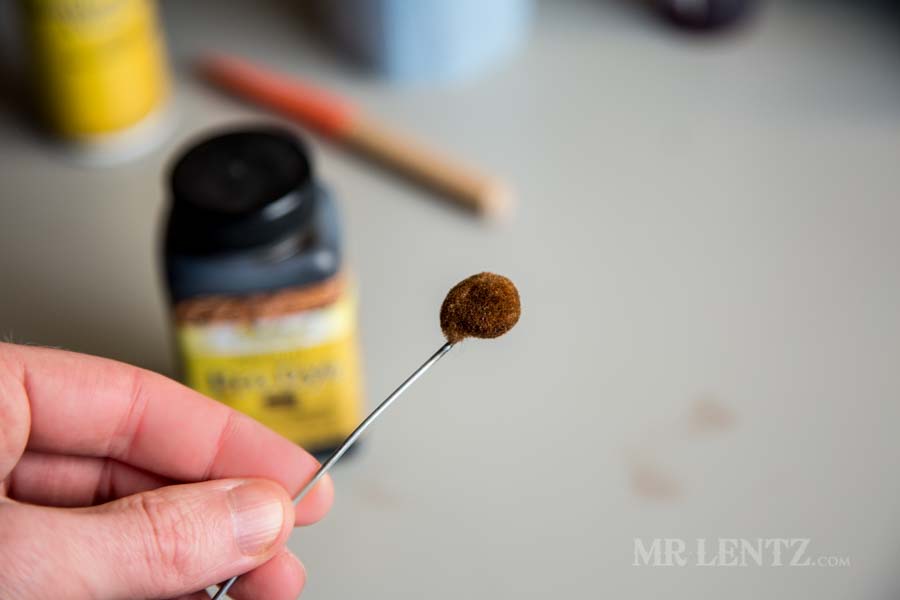
For edge dyeing I use a small wool dauber. The initially come very fluffy…and if you tried dyeing with it like that, you would quickly ruin your edges with dye running everywhere. The trick is to use a lighter and burn the dauber down to a nice crisp ball. Above is how I have mine, but it can be even more accurate if you let it burn to a smaller width. After burningrub all the charred bits off and it’ll be ready to use.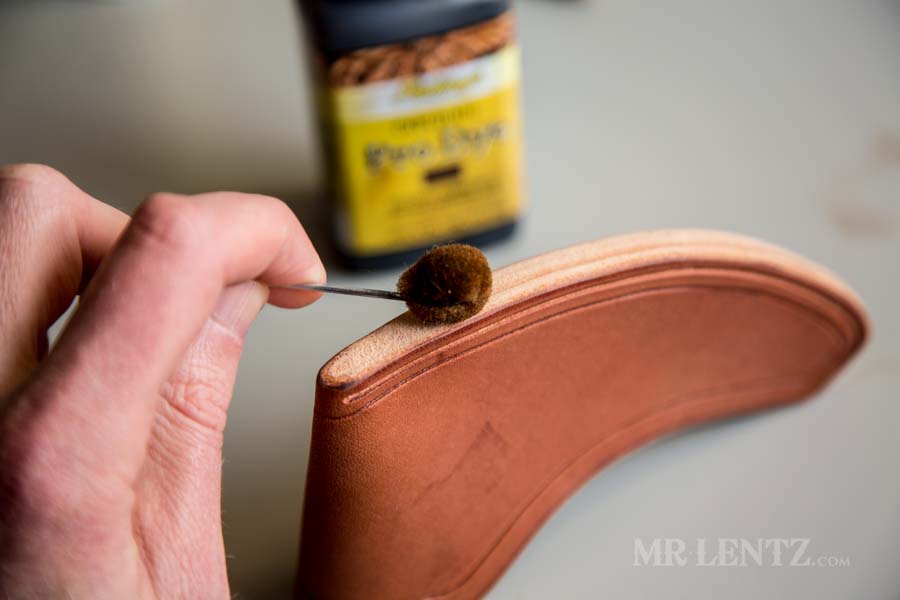
For this step I needed two hands, so there’s no dye on the dauber in the photo. Basically I dip the dauber in the dye, then blot it out on a paper towel to remove 90% of the dye. Only then is it ready to run along the edge with a very steady hand. I usually dye in three steps, one pass for the center of the edge, one pass for the front edge, and one pass for the back of that same edge. This lets me keep an eye on how straight I can get the dye line. Obviously, practice makes you much better, so I’d recommend trying it out on may scrap pieces first.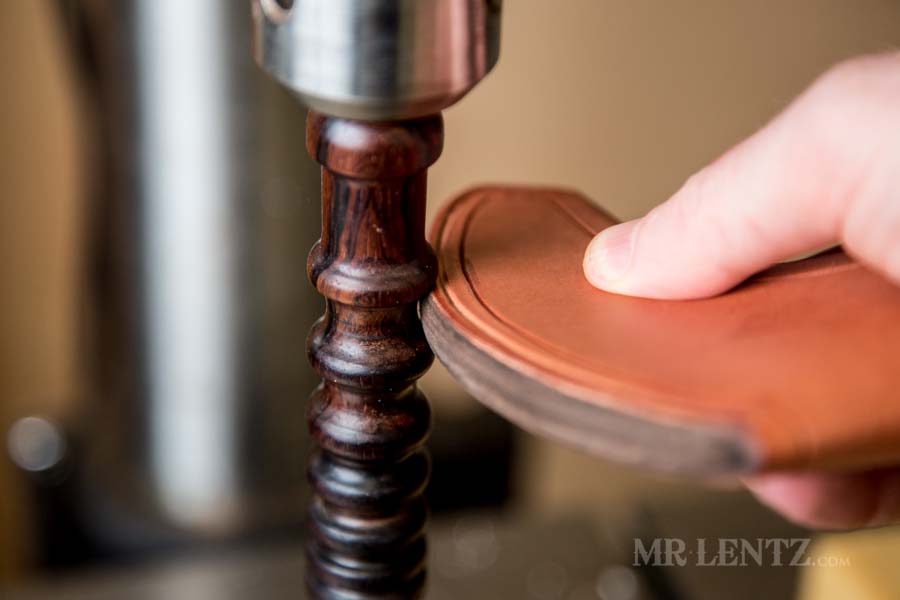
While the edge is still damp, or if it has dried then you should re-dampen with a wet cloth, take your sheath over to the edge slicker/burnisher. I have a cocobolo edge slicker/burnisher that fits into my drill press. It works great! That said, you can accomplish this same task simply by using a piece of canvas cloth, or jean material. Using the cloth, apply pressure and rub vigorously on the edge. You’re edge will shine up in no time.
Using a burnisher like the one in the photo above, apply a bit of pressure and feed the edge through one of the slots.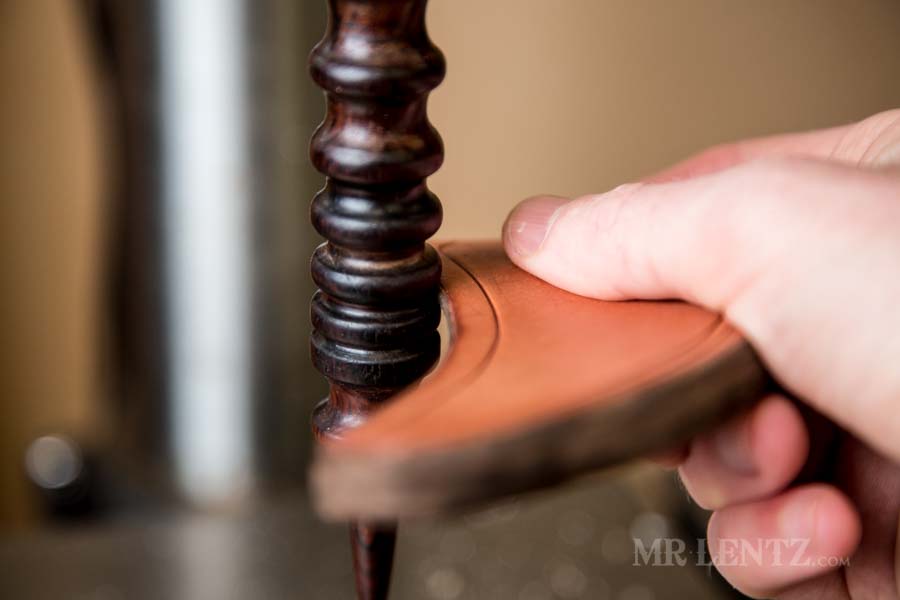
What works best with these tools is to try and burnish in three steps, middle of the edge, then bottom side, then top side. 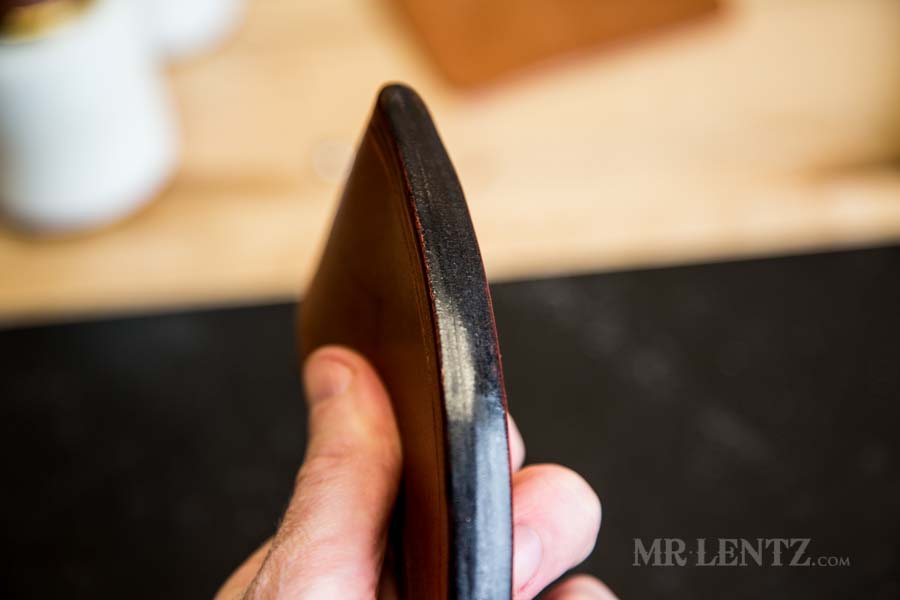
After slicking you should have a nice shiny and smooth edge. You’d be done with the edge (minus stitching), except we need to oil and wax the sheath as a finish, then polish the shine back into the edge thereafter.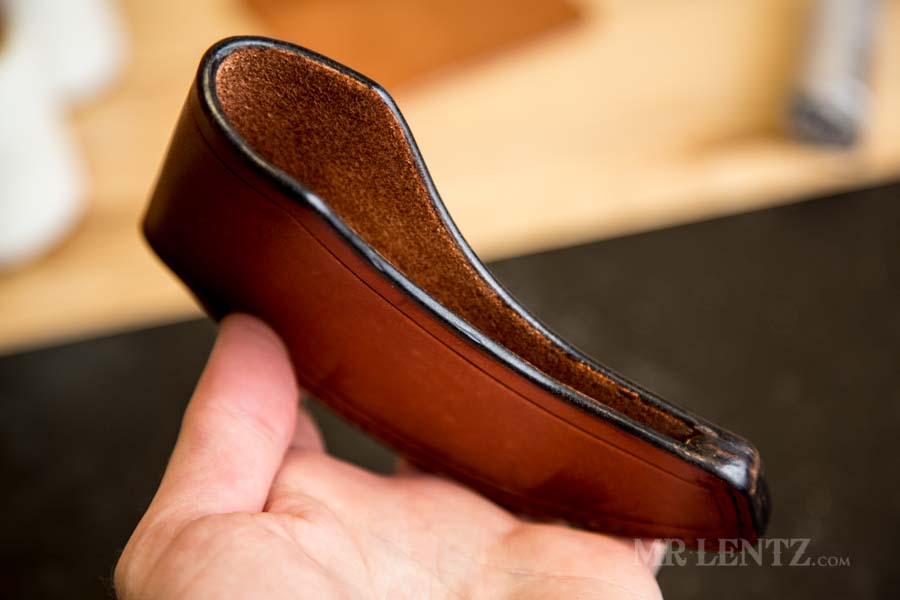
Here’s a nicely slicked edge on the axe sheath. That’s a good place to hold things for now while I prep the stitching tools for the next steps in Part 3. Thanks – and hope your sheath is turning out well!
Jump to Parts 1 or 3:
Part 1 Part 3Like this post so far?
I spend most of my free time creating tutorials like this to help those like yourself get into leatherwork and woodworking, or get better at it. If you'd like to support my efforts, consider checking out my handmade leather goods shop and purchasing a gift for yourself or a loved one. It's readers like you that help keep a small U.S. business like mine going strong, so -thank you!
Having a great time following your tutorial! I’m a little nervous about dying my edge and have considered skipping the process. I’m doing it though as I need to remind myself that this is a learning project. I’m learning very much and have been paying close attention to you r helpful tricks of the trade. Thanks
Hi Matthew – glad to hear you are enjoying the tutorial! On edge dyeing – I highly suggest testing out the process on numerous scrap pieces treated the same as the edge on the sheath. There’s a subtle art to it, as well as building a steady hand for it. I too botched a few of my early pieces by not practicing, so just wanted to pass that along! Good luck!