
Leather Axe Sheath DIY - Part 3
In the final steps of making a leather axe sheath I’ll show you how to stitch things up, attach the retaining strap and apply the protective coating of beeswax to the entire piece. If you got to this page first somehow, you may want to go back and read Part One here, or Part Two here. Ok, let’s get on with it!
Jump to Parts 1 or 2:
Part 1 Part 2Stitching the Axe Sheath
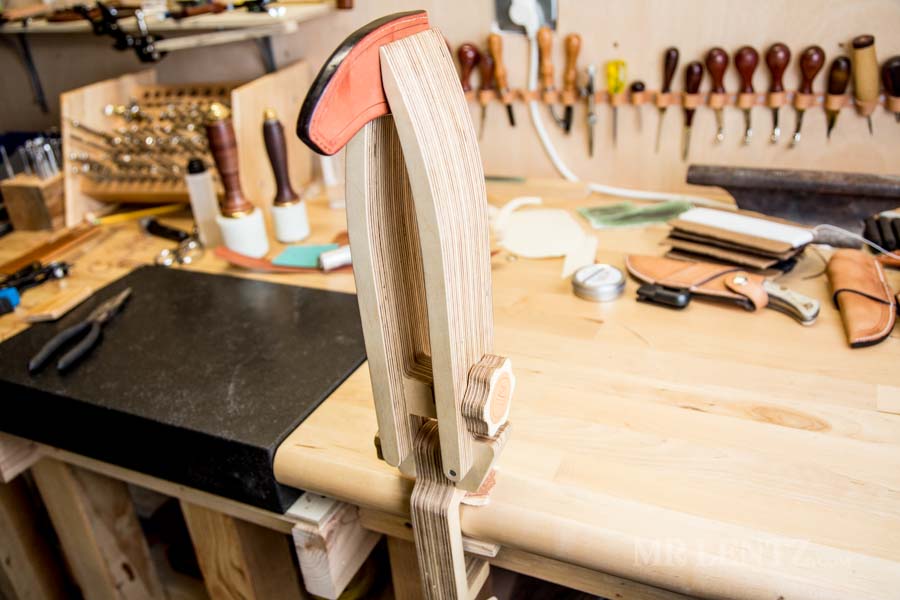
I have clamped my axe sheath into a tabletop stitching pony. Ideally, you may want to line the edges of the stitching pony with leather to prevent marking the sheath.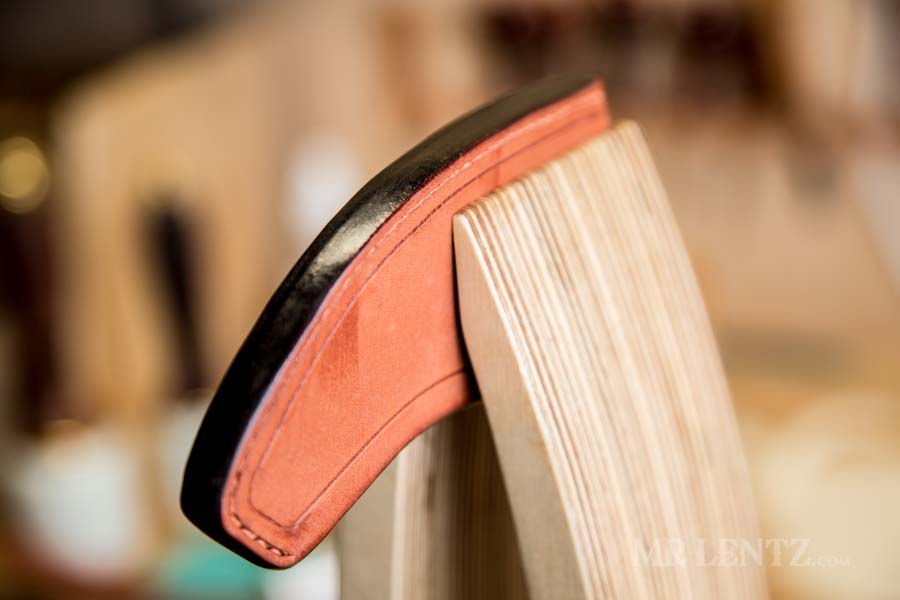
I like to start my saddle stitch at the top folded part of the sheath, work my way down and end it with a few back-stitches on the lower portion.
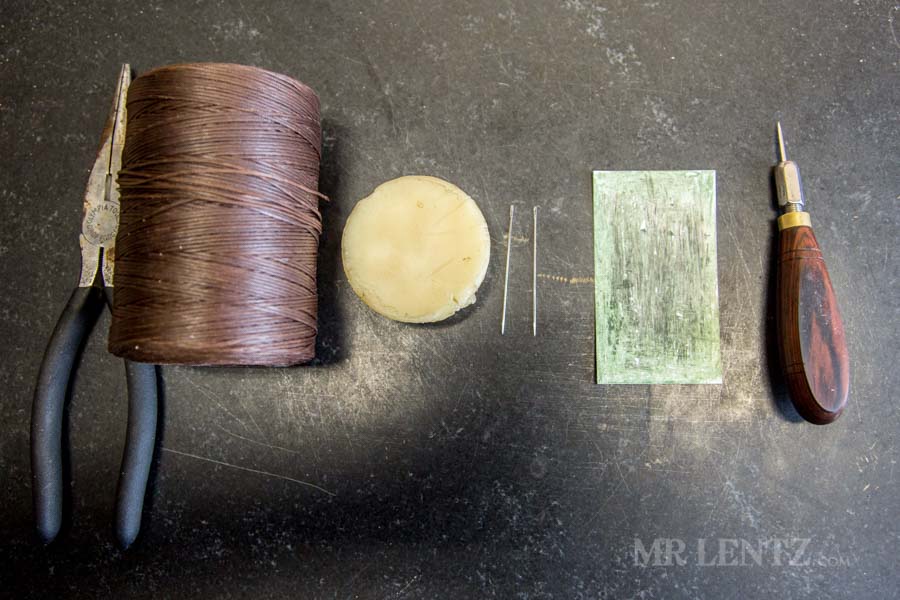
The tools of the trade shown above. For this axe sheath I have a pair of pliers (handy for pulling needles through three layers of 8/9 oz leather!), Ritza Tiger Thread 1.2mm, a ball of beeswax mixed with pine rosin (more info below), two John James Harness needles needles #002, a business card with green polishing compound rubbed into it, a diamond stitching awl.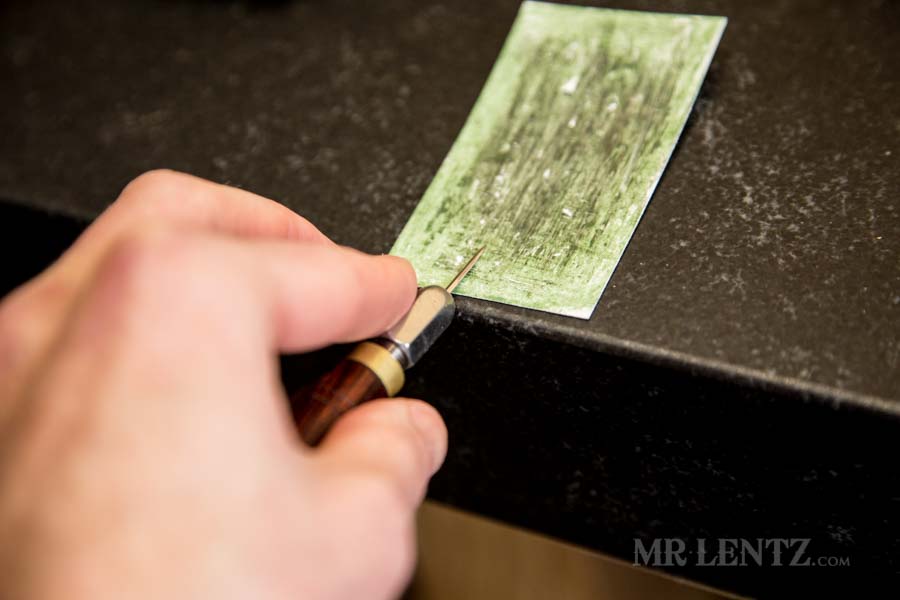
When stitching leather this thick it is extremely important to use a very well sharpened and polished awl blade. When I say well sharpened, I mean you are better off buying it from a reputable supplier like Barry King Tools, that will pre-sharpen and polish for you to be perfect. Starting out with a perfectly polished blade and only having to hone it a bit as you go is (from my own experience) much easier. Before I begin a stitching project I always polish up the awl blade on the green compound. This helps remove any microscopic gunk and levels out any minute scratches.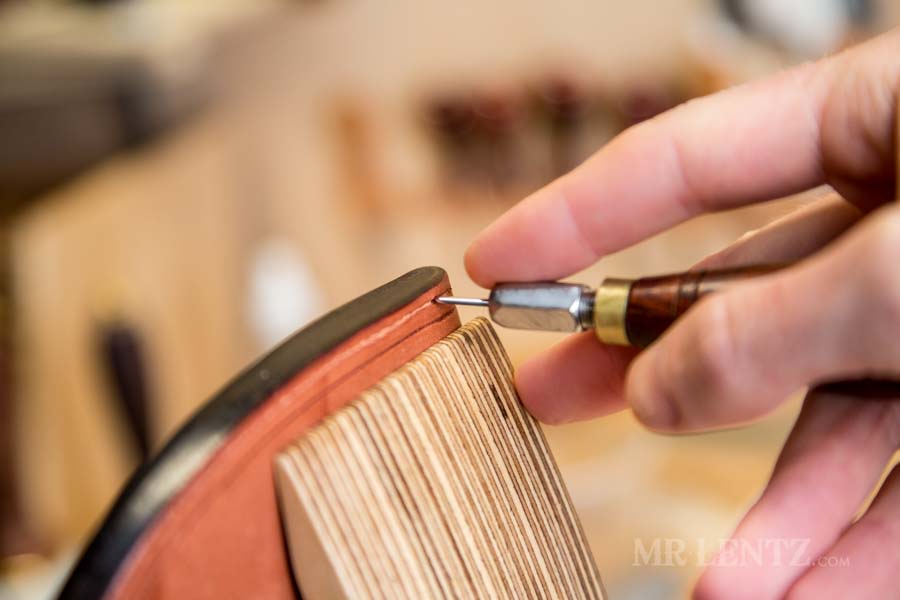
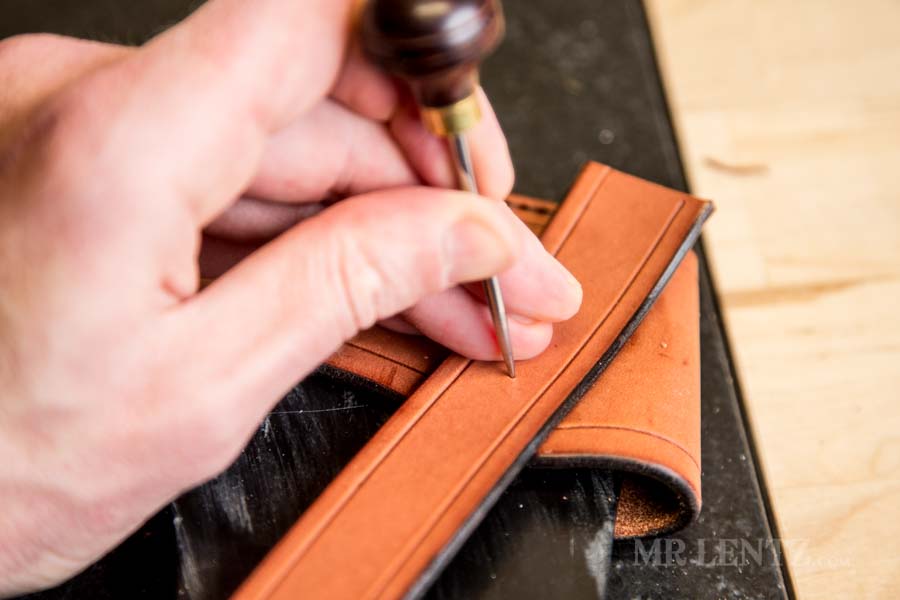
Using my pre-punched holes, I place the awl into the first (noting the angle of the diamond shape) and gently push through to the other side. It will take some pressure, but if you are having to force it…take my advice and stop, go and polish the blade for a few minutes or more. Mistakes happen much more easily with dull tools and pressure. You will end up piercing the leather in the wrong spot, or worse…stabbing yourself and taking a trip to the hospital!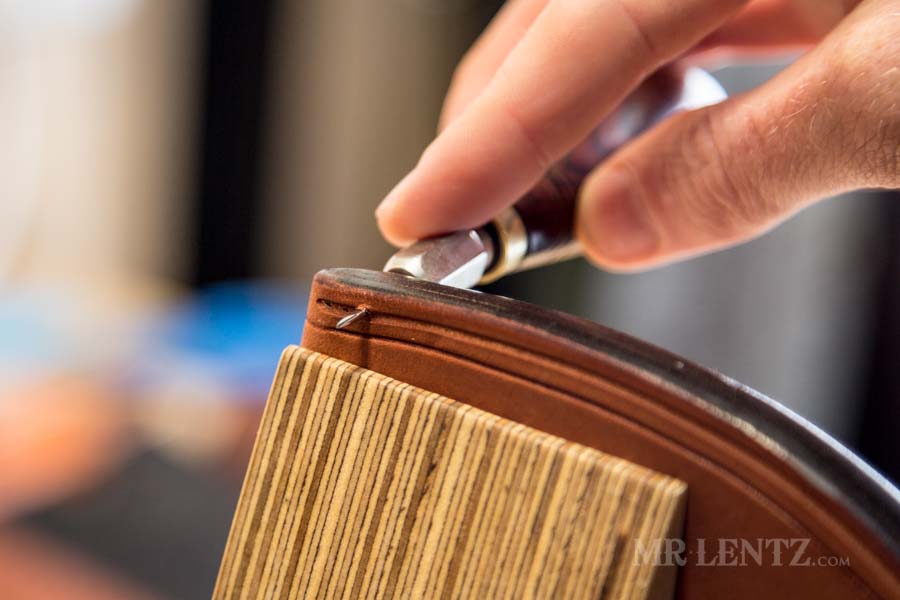
When you are gently punching through, take note of the backside of the leather . You are aiming to hit the stitch groove in the center. I generally go slowly but not all the way through, only until I can see the pressure point on the backside, then I adjust the angle of the awl blade to better hit the stitch groove and push all the way through. If you miss a few times it is no bit deal, just pull the awl blade out and re-try. Usually wetting the mistake hole and rubbing it is enough to make it shrink away. I like to punch around 7 holes in advance, then stitch them, then punch 7 more. If you get too far ahead the holes will partially close up and it’ll make things difficult.
Above I am waxing my thread with beeswax and pine resin. I use a double boiler and heat up a mixture of 1 part beeswax to 1 part pine resin crystals. Then I pour into cups and refrigerate until hard. This makes for a nice sticky wax mixture that helps your thread hold in place. Keeping things nice and tight as you go.
On this sheath I am using the saddle stitch. Instead of re-showing every step of this stitch, I have put together a separate tutorial on How to Sew Leather here. Head on over to the tutorial if you need to see all steps involved. It’s a simple stitch to learn, but you need to get the order of things right.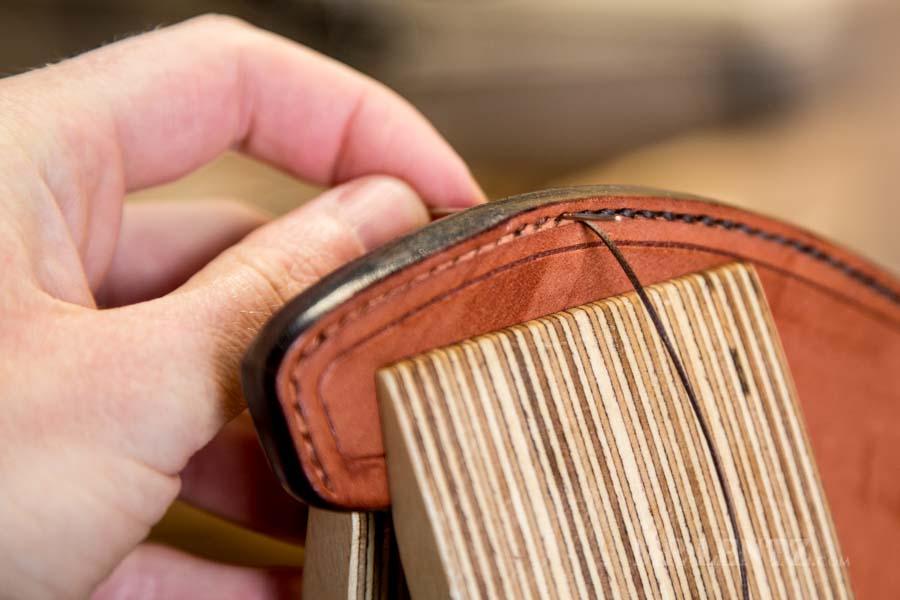
Working your way down the sheath, make sure to pull each stitch tight.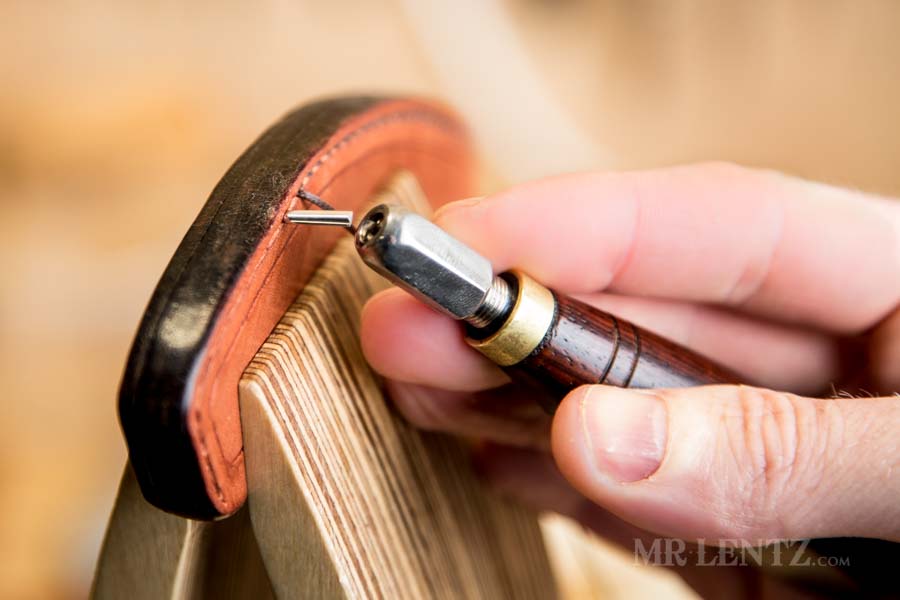
While punching the awl holes I had an unfortunate accident with my awl blade. In trying to re-adjust the angle to hit the back side stitch groove, I didn’t realize that I was bending my blade so much. It snapped under a bit of pressure… so take care not to make the same mistake!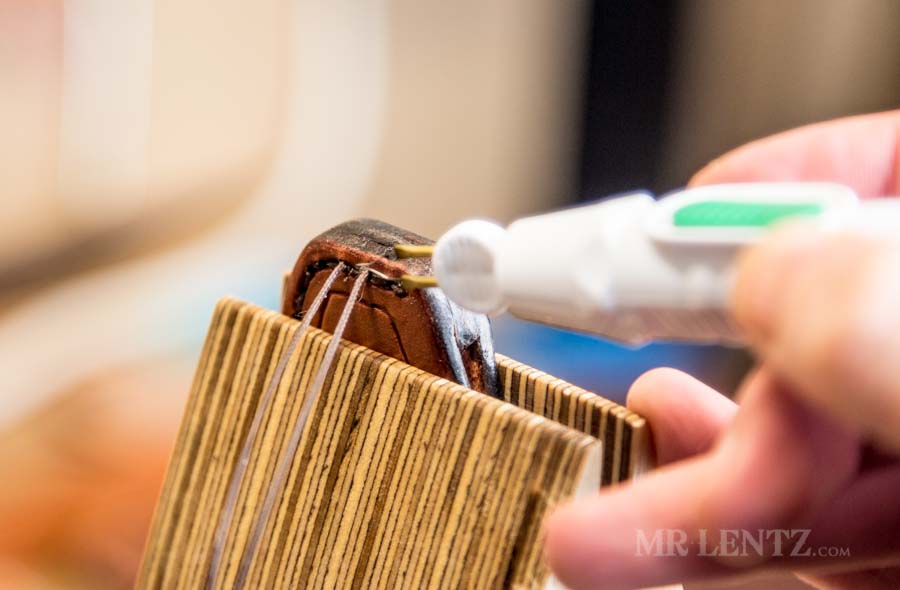
After finishing up the back-stitch (short tutorial on it here), I used my thread burner to cut the threads off.
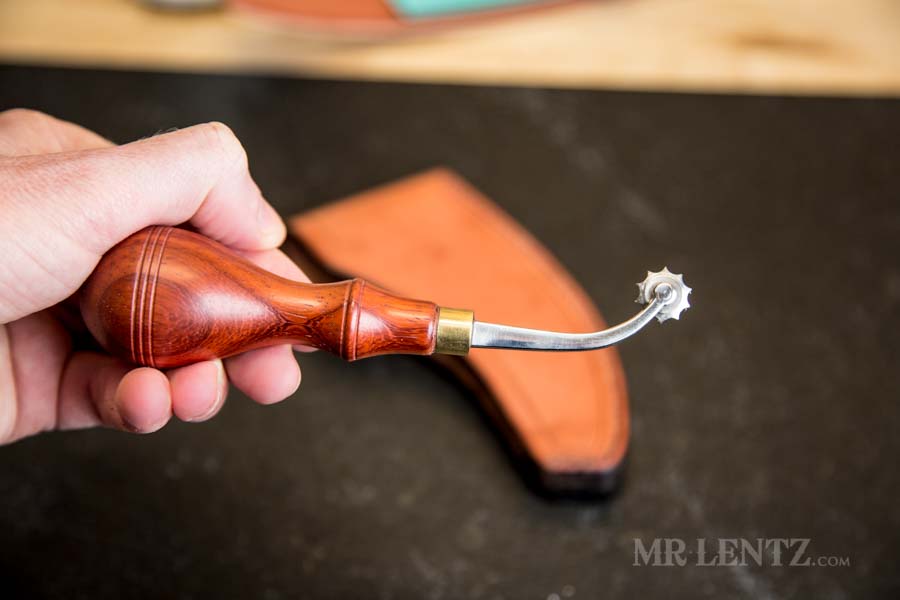
Sometimes I use a stitch hole marker on the backside of my stitches to help clean them up a bit. This is a 6 stitch per inch one that should match the hole spacing I used. On the back side of the stitches, it is never exactly spaced evenly, but running this marker tool over top of them can help them look just a tad bit nicer.
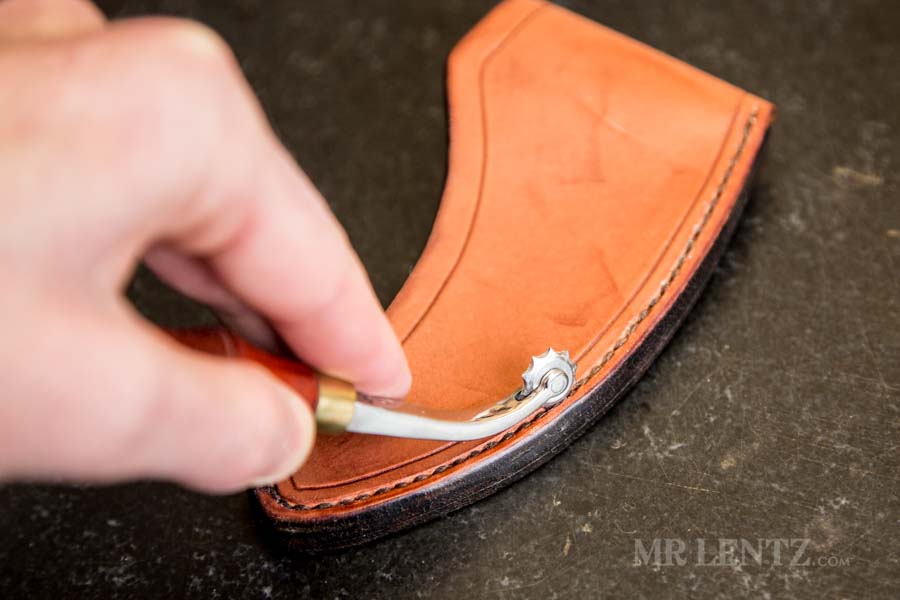
I run the stitch spacer up and down the stitches on the back side a few times.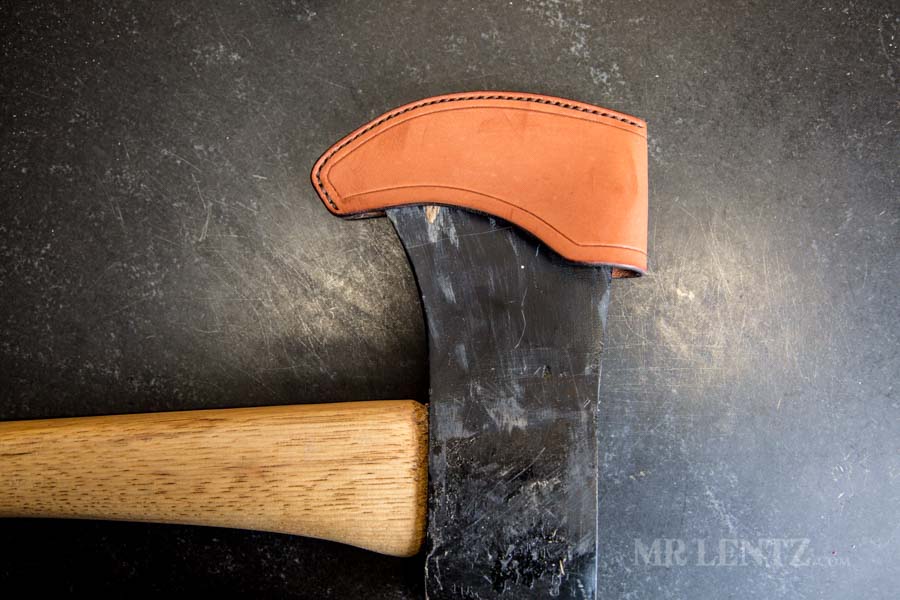
I test fit the sheath at this point to make sure everything is working right. The blade slid in nicely and there was just enough room to get beyond the welt on the lower entry point. Things are looking good at this stage.
Fitting the Retaining Strap
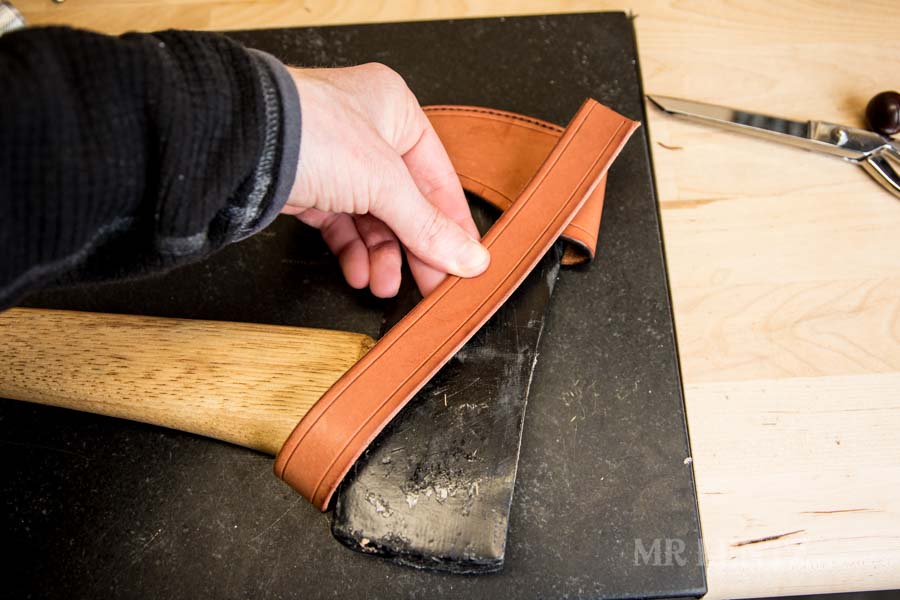
With the sheath fitting nicely, we’ll need to make sure it stays on the blade using the retaining strap. The strap will wrap around the axe as pictured above. I will rivet it to one side, and place a ligne 24 snap on the other.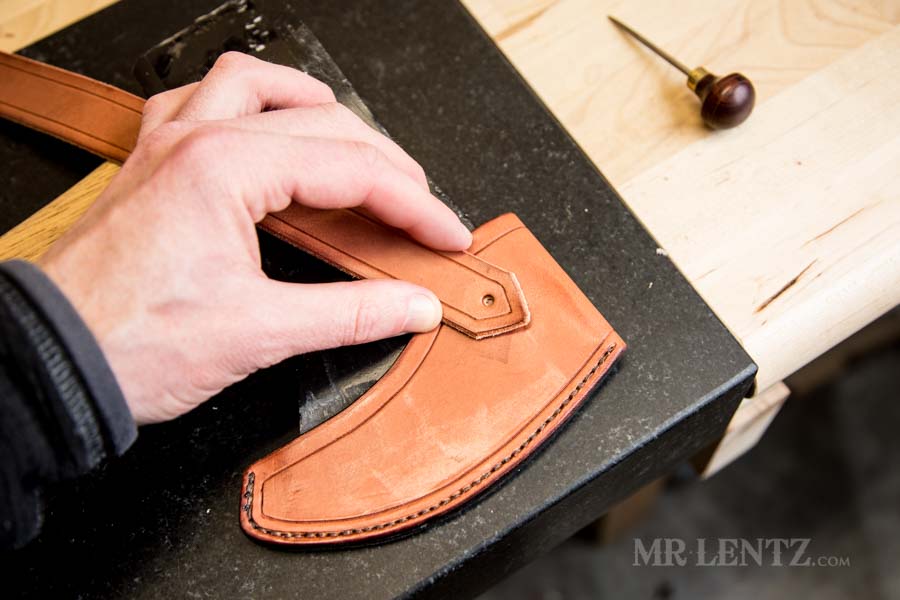
First I position the strap on the sheath body where I want to rivet it on the backside. Keep in mind, it will be much easier to set a rivet closer to the edge at this point, since the body is sewn up.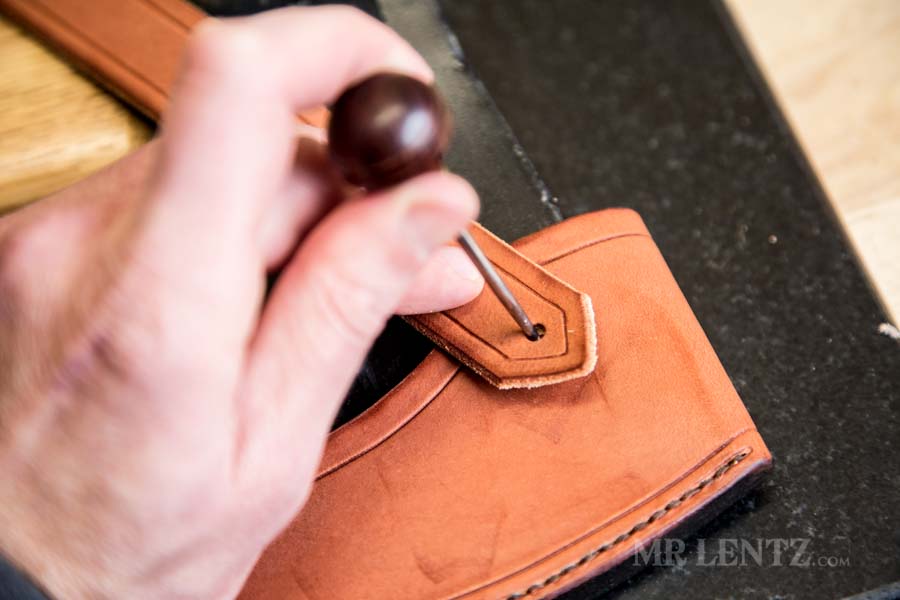
Using a scratch awl I make a mark where the hole will be punched on the body.

Go ahead and punch the rivet hold just big enough to fit your rivet.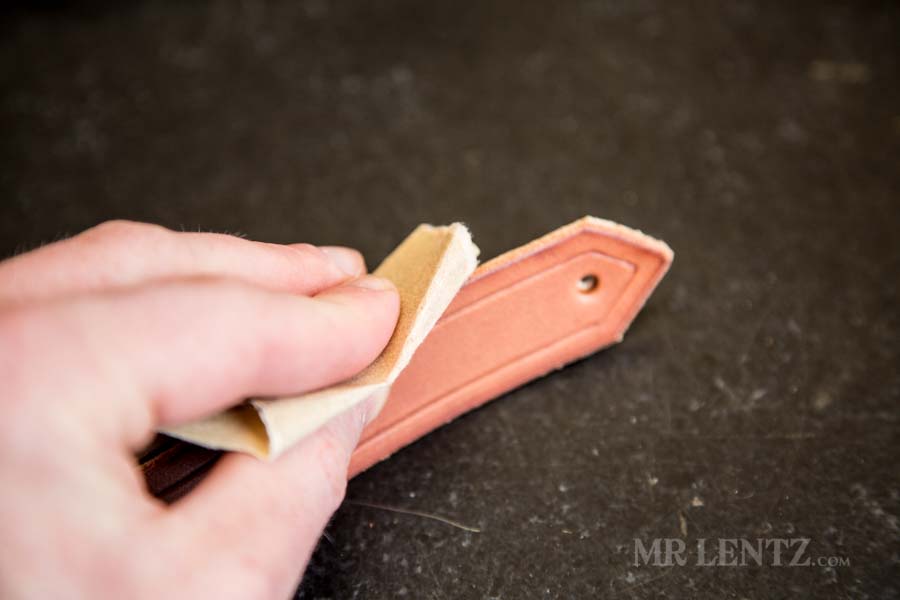
Before attaching the strap it’s important to get most of the edge finishing out of the way since you wont be able to get into any tight spaces to dye or polish. I used a 220 grit on the edge of the strap.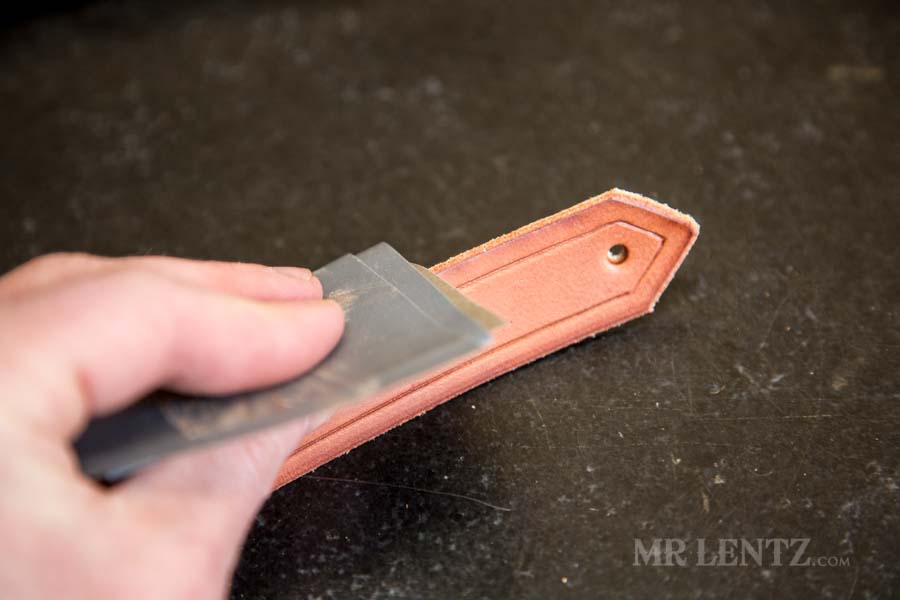
Then a 600 grit on the edge to get it nice and smooth.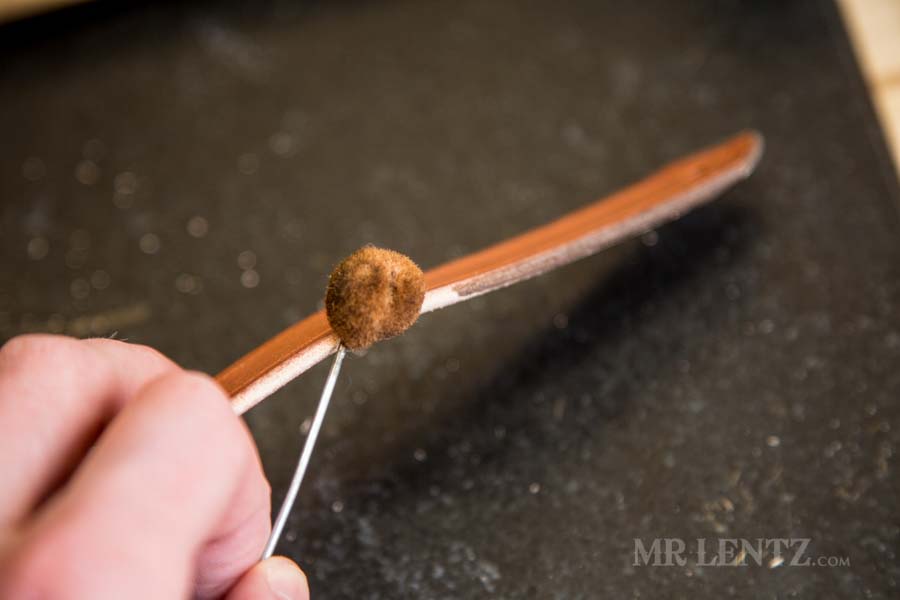
With the same edge dyeing technique described earlier, go ahead and apply your coat using the dauber. It is not necessary to edge dye, more of a personal artistic choice.
Taking the strap over to the slicker while still damp from the dye (or re-dampen with water if necessary), I slick all edges on it. Careful not to hang out in one spot with the slicker, it’ll get hot and singe the leather.
Attaching the Retaining Strap
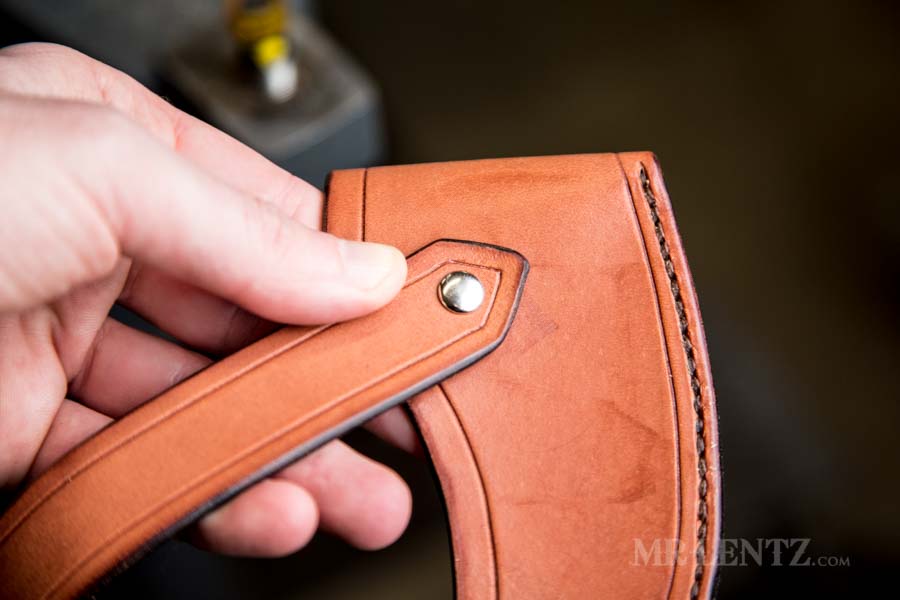
Place the rivet through the sheath and strap.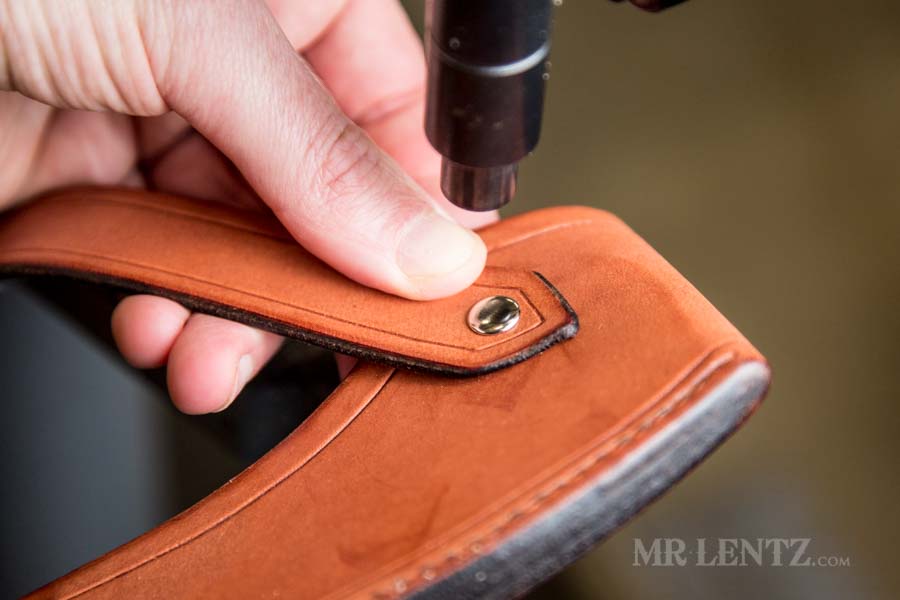
Using a hand-press, or foot press, or rivet setting kit with a mallet, go ahead and set the rivet in place. Make sure the strap comes off the body at about a 45 degree angle. It needs to head that direction in order to wrap around the back of the axe.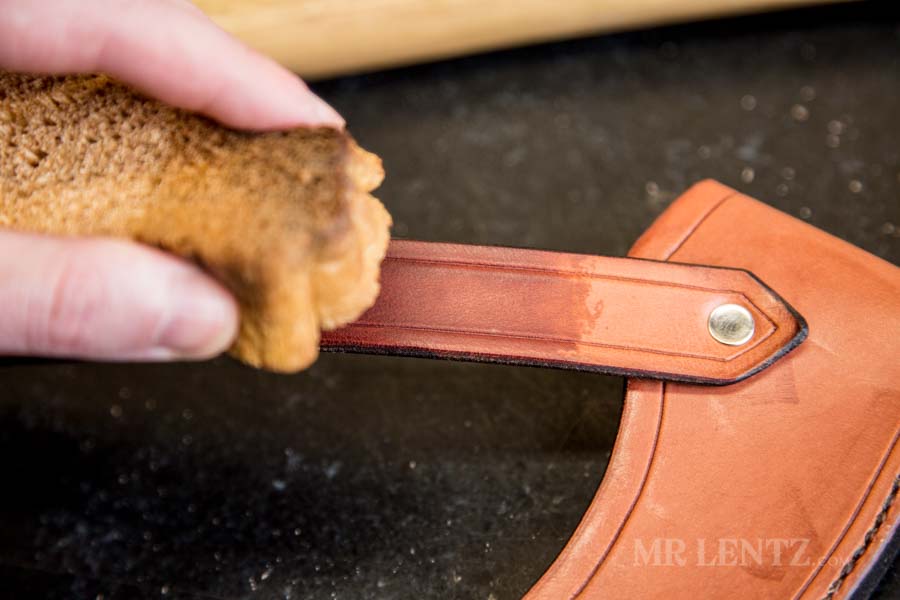
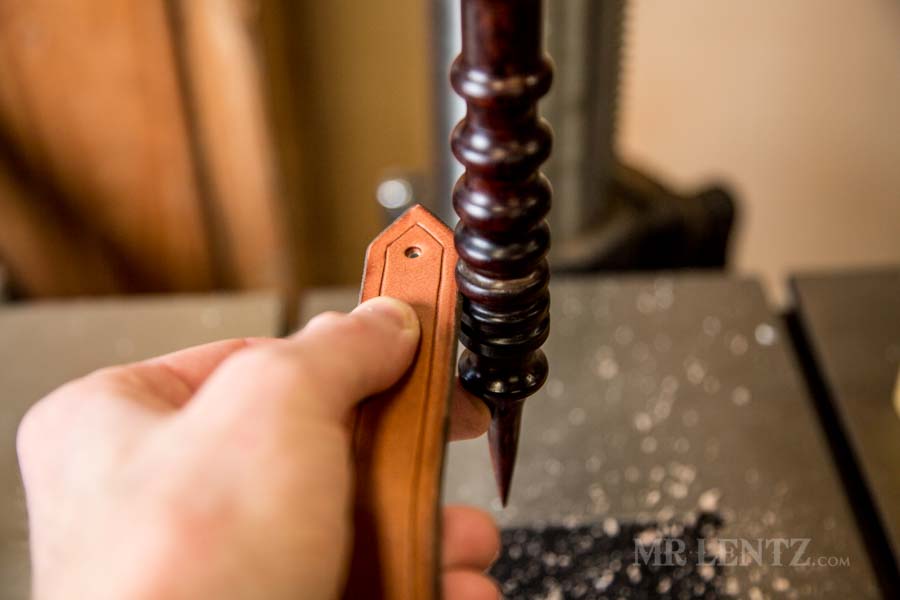
Before I forget – it’s time to punch my maker’s mark. If you have a makers mark, then go ahead and wet the strap where you want the mark to be placed.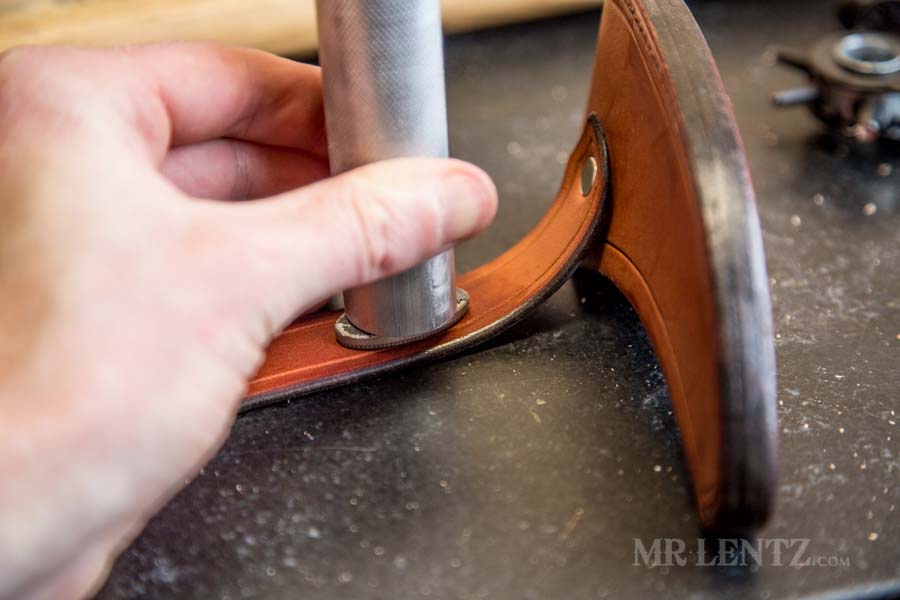
Using a firm surface, I have a 4 inch granite slab for things like this, hold the maker’s mark firmly and use a plastic tipped weighted mallet to set the mark in place.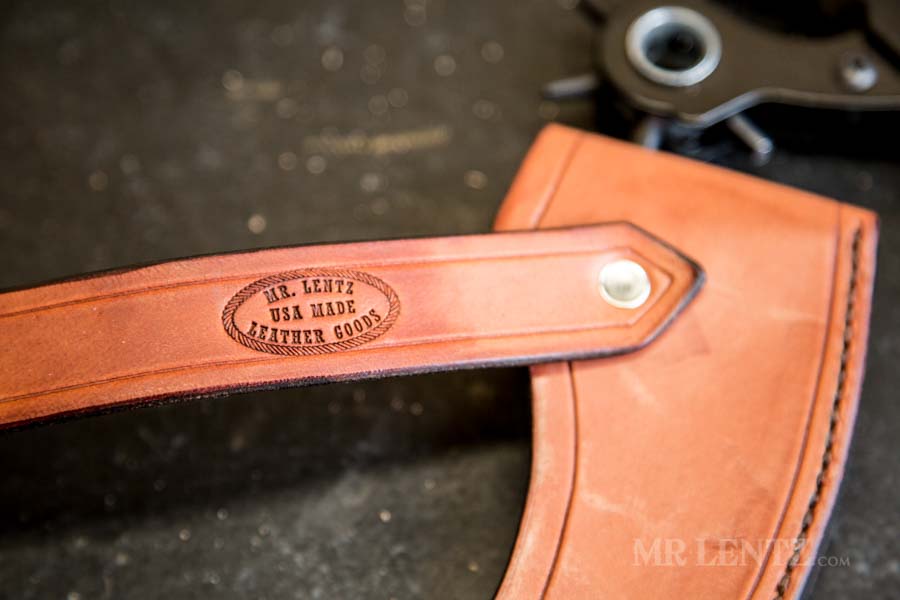
With a mark like this, it works best if you only need to hit once with the mallet. I use a weighted 32 oz. mallet.
Like this post so far?
I spend most of my free time creating tutorials like this to help those like yourself get into leatherwork and woodworking, or get better at it. If you'd like to support my efforts, consider checking out my handmade leather goods shop and purchasing a gift for yourself or a loved one. It's readers like you that help keep a small U.S. business like mine going strong, so -thank you!
Ok, now that we have the strap rivet on, we can find an accurate spot to place the snap on both the strap and the body. With the Axe in the sheath, wrap the strap around it to secure it in place tightly. Then while holding the strap in place on the body, make a mark where you want the snap to go. Again – keep it closer to the edge to avoid trouble getting the snap setting tool inside the sheath.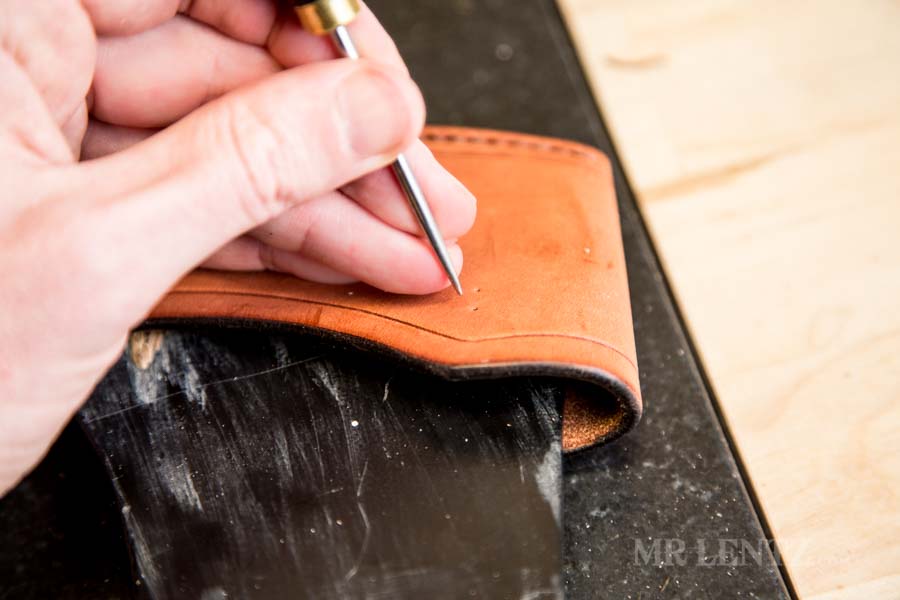
Keeping your hand with the awl in place, let the strap go and make a mark on the body at the same spot. There’s two marks in my photo above, the top one was a mistake!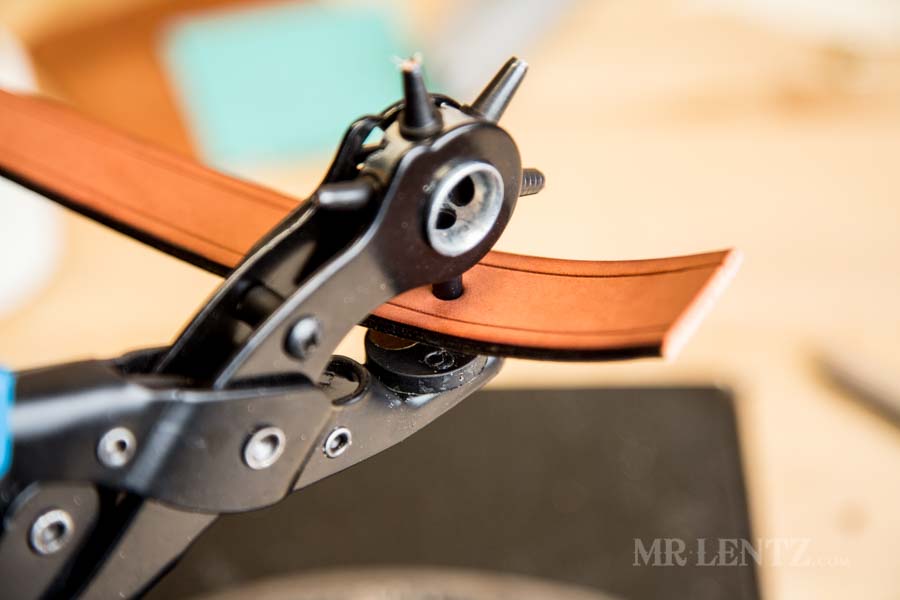
Punch the hole for the snap on the strap and make it just wide enough to fit the snap hardware.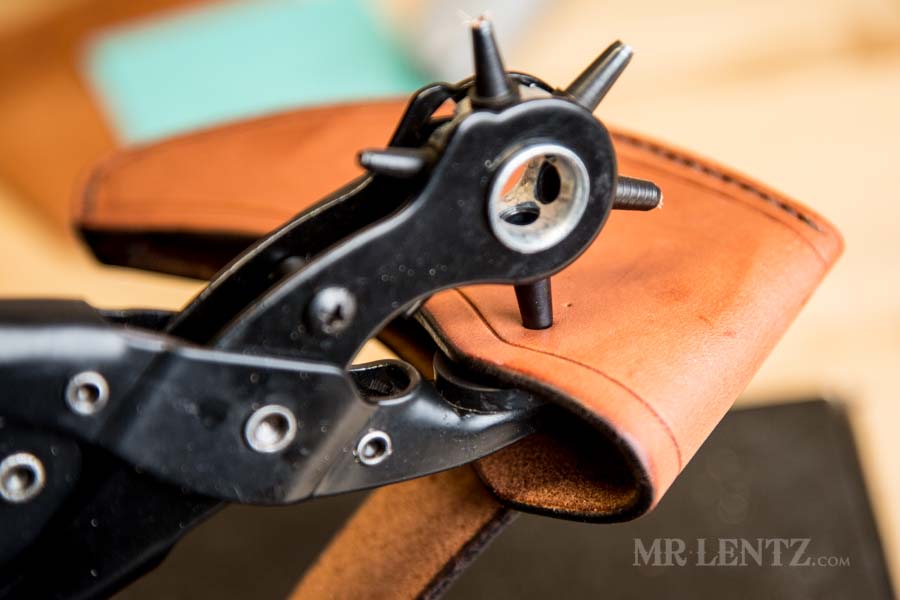
Punch the hole on the axe sheath body as well.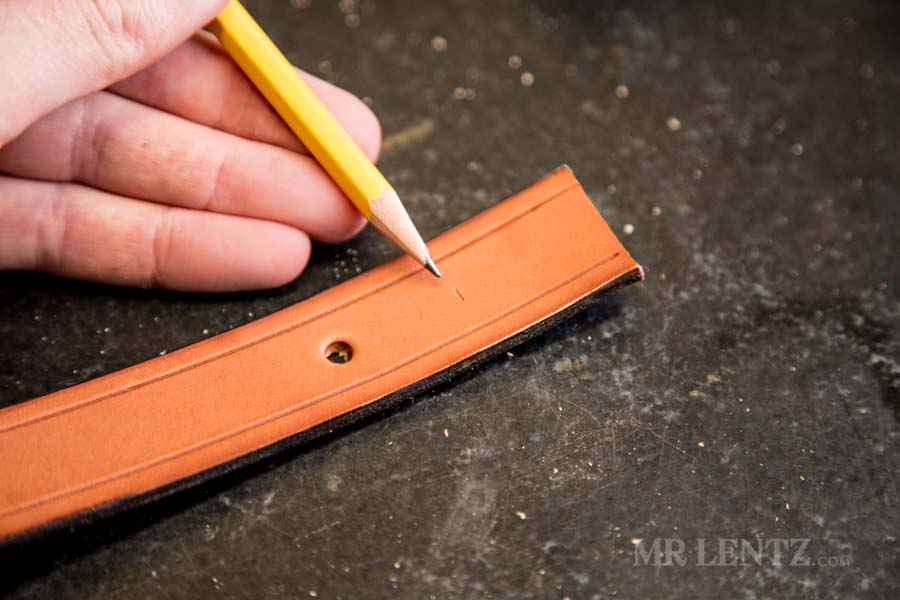
On the strap, mark where you would like the tip to be in relation to the snap. I like to give it around an inch from the hole – that’ll give enough room to grip the strap with a finger to unsnap.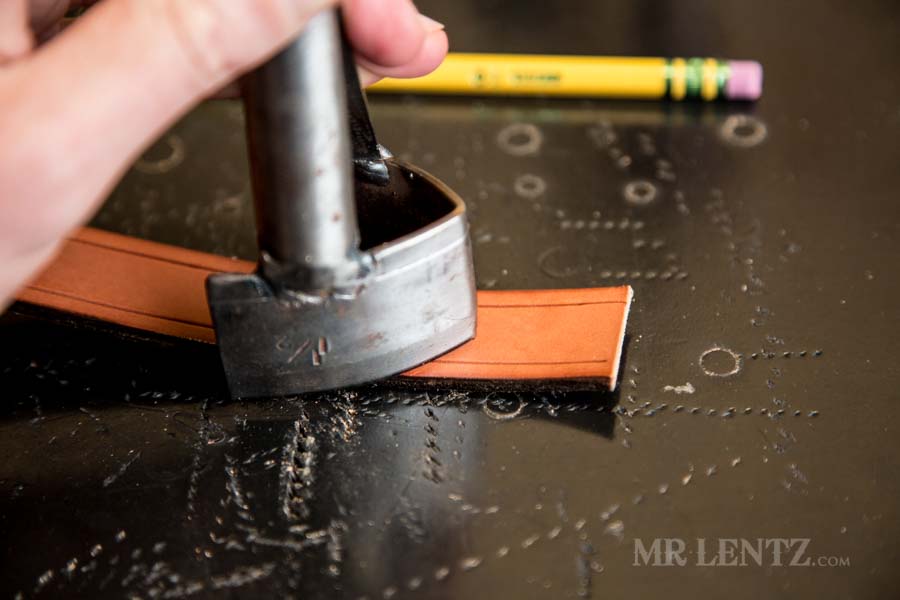
Using the belt end tip punch, line it up and punch off that end. You can also just use scissors, but this tool give a much more uniform look.
Bevel the edge on the top and bottom of the freshly cut tip.

Sand the tip down using your fine and extra fine grits. Then go ahead and dye the tip edge too, slick it while damp with the edge slicker so that it will match the rest of the edge. 
Place the female parts of your snap in place and bring it over to your snap setting tool of choice.
Set the snap tightly so that the parts do not spin around when you test it between your fingers.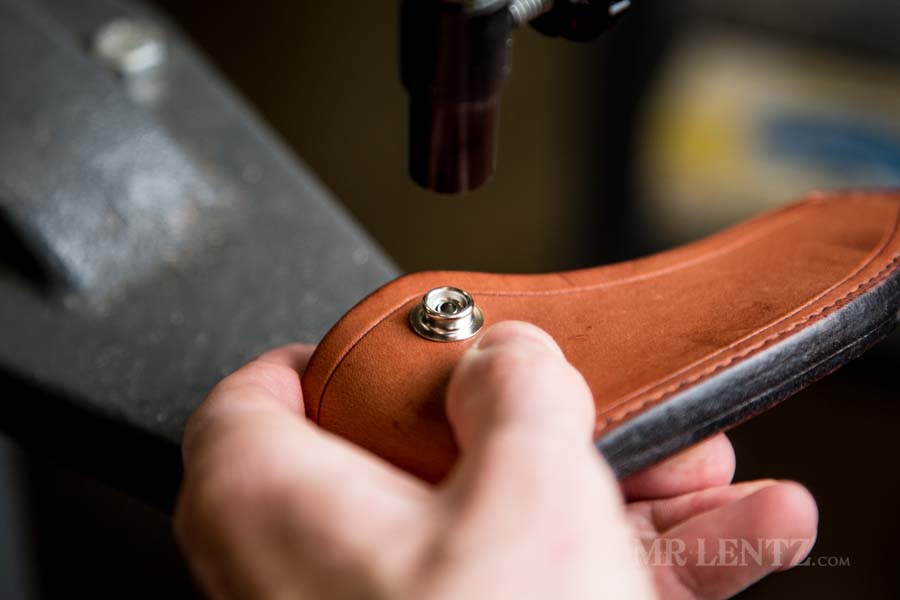
Place the male parts of the snap on the axe sheath body. You may need to bend things a bit to get it to work with your setting tool.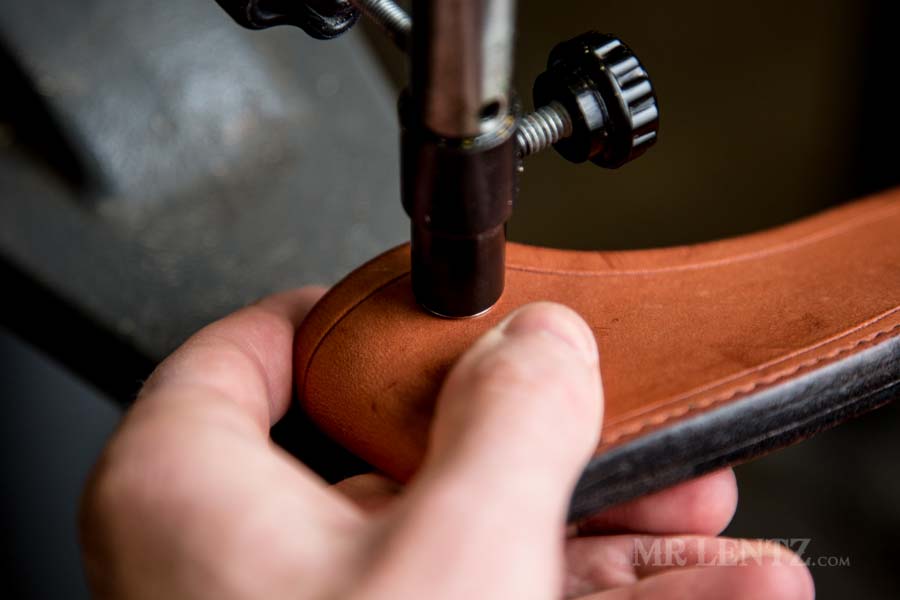
Press the male snap on tightly as well.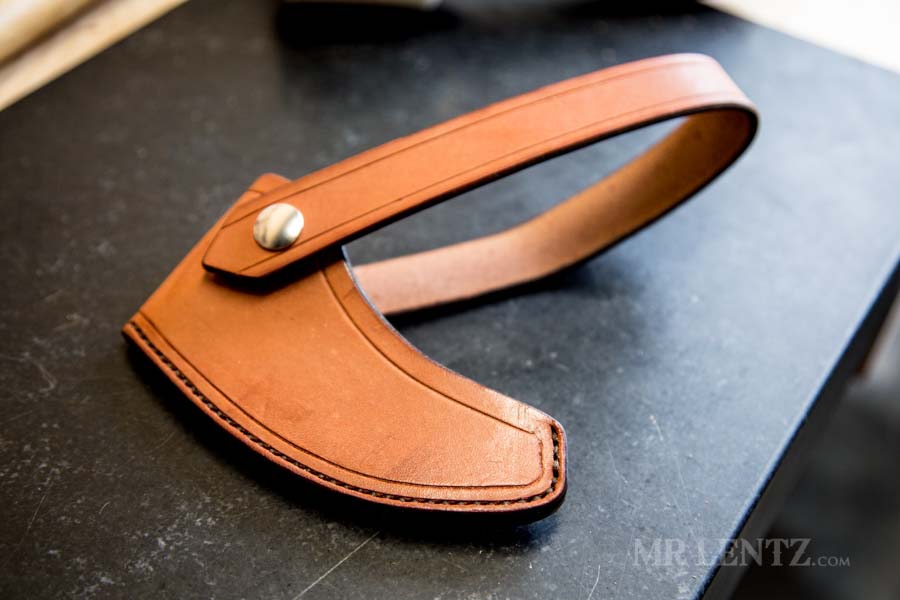
At this point we have a nearly completed axe sheath. We will just need to apply a finish to help lubricate the fibers and protect the leather from moisture.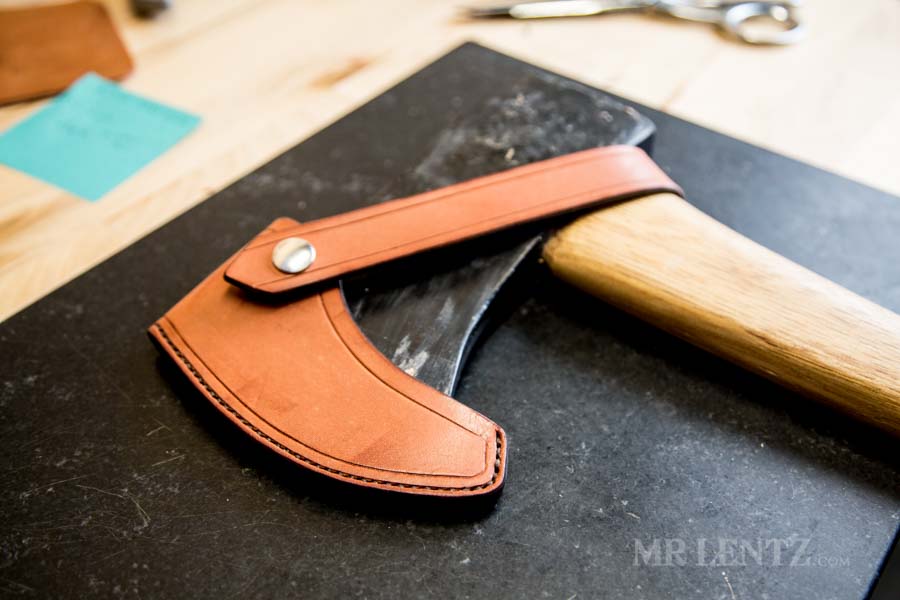
Test fitting the sheath with retaining strap and everything is nice and snug.
Hot Wax Dipping the Axe Sheath
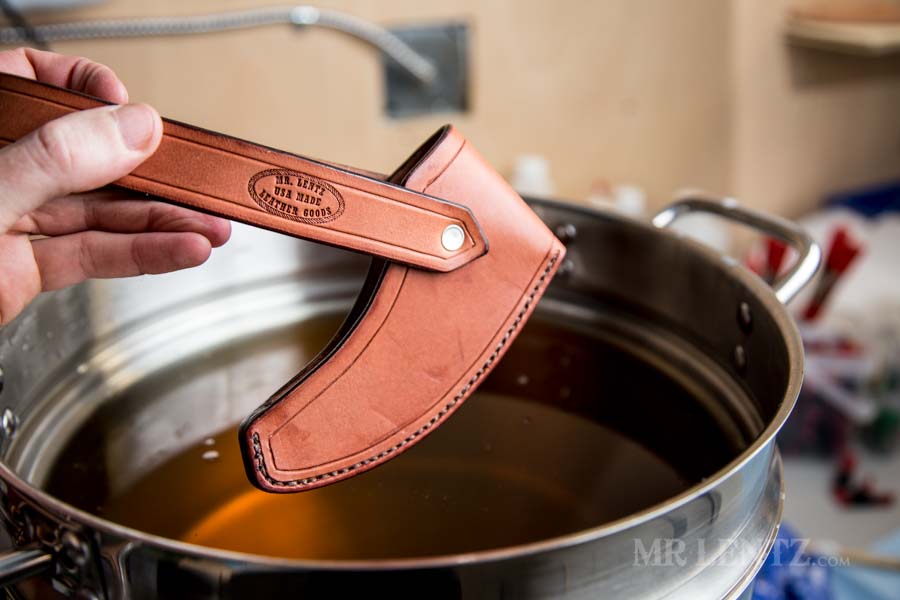
For thicker leather items such as sheaths, I prefer to finish them using the hot-wax dipping method. It’s an age old technique used by the saddlemakers of the old West, as well as leatherworkers thousands of year prior to them. It’s simple, can be messy, chemical-free, non-toxic, very long lasting, and the best part… I believe it’s the best way to finish leather goods for longevity and water resistance. There are many different wax recipes out there, and yours may change depending on your own needs.
I use about half neatsfoot oil to half beeswax, double-boiled in a pot large enough to dip things into. I heat it up a good 45 minutes before I am ready to dip, then let it cool a ways down, but not harden. I then grip the sheath in a less conspicuous area and dip into the hot wax. How long you hold it down is up to your own experimentation. I dip mine fairly quickly, longer if I am looking to really darken the leather. It’s worth noting that hot wax tends to get everywhere, so I’d recommend doing this in your garage and put some newspaper down for easy cleanup.
The sheath will be left coated in a layer of wax. A fair amount will have penetrated the leather, but now we need to get the out layer to absorb as well. If you did a very quick dip, you can let the wax melt into the leather using a heat gun. If you made a longer dip, I’d advise that you wipe off most of the wax with a paper towel first, then use the heat gun to clean it up. Take your time with the heat gun, too much heat will destroy the leather, shrivel it, and singe it. Hold it further away from the leather and just know that this step may take a while.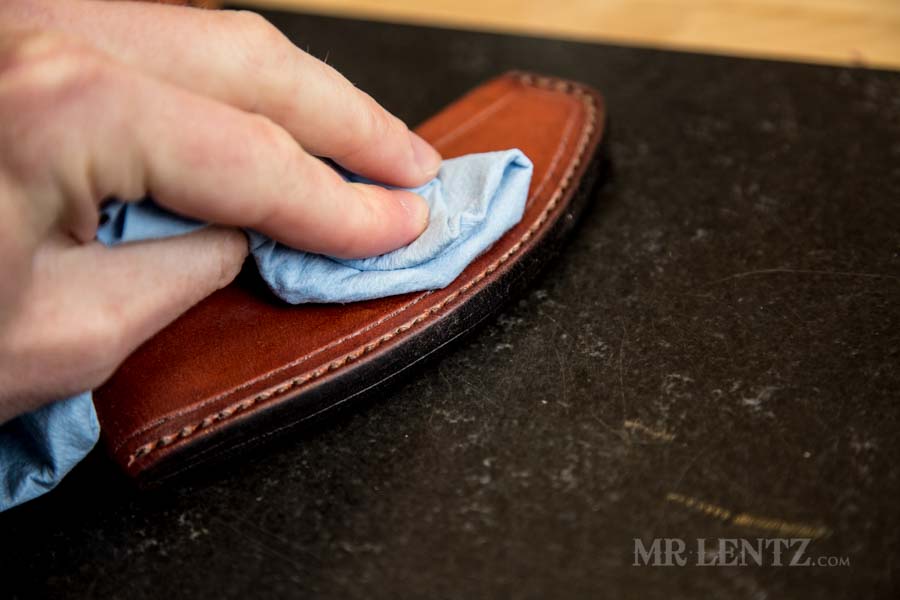
Once most of the wax has melted in I like to take a soft cloth and hand-bush the leather bit to bring out a very subtle shine.
Final Edge Polishing
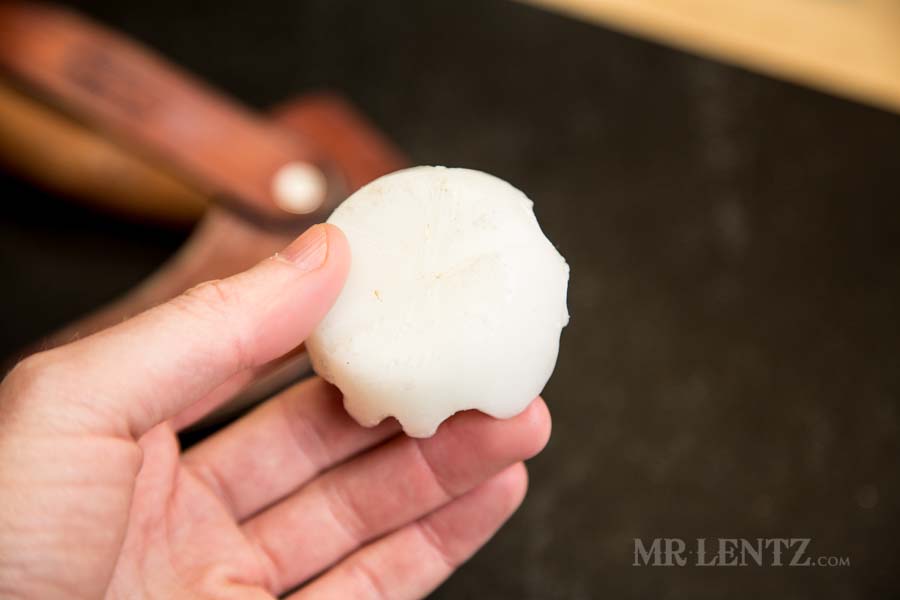
In the process of hot-wax dipping, the edge on the sheath will lose its luster. To bring it back and then some, I make little pucks of beeswax and paraffin wax. Paraffin wax is a much shinier wax and buffs up nicely.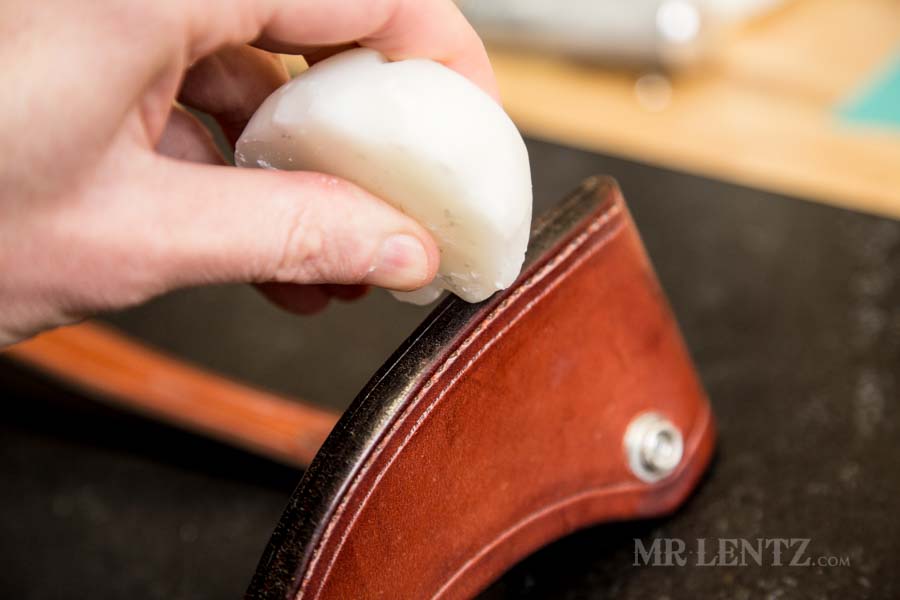
I rub the wax puck vigorously into the sheath edge.
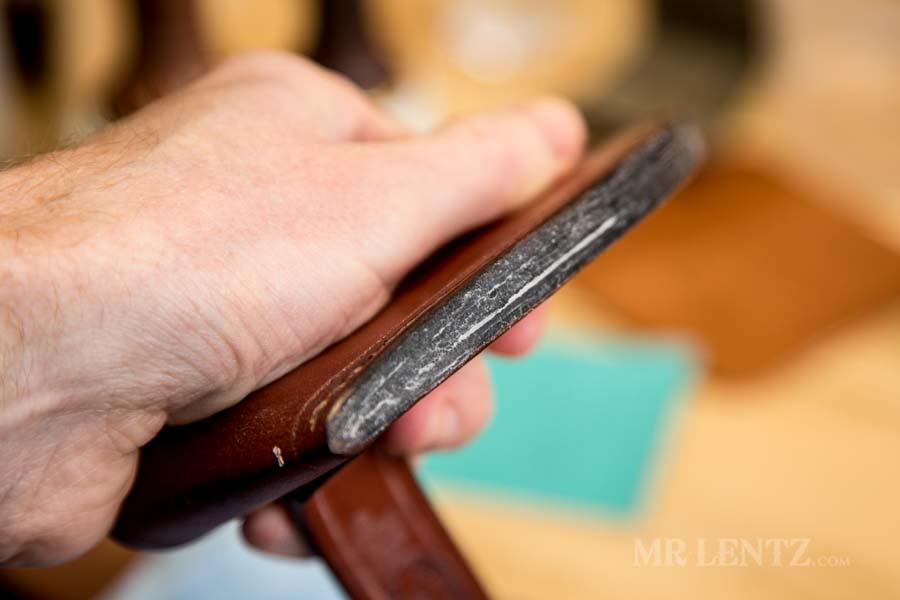
Above you can see the wax build up on the edge. Make sure to wax the opening edge as well.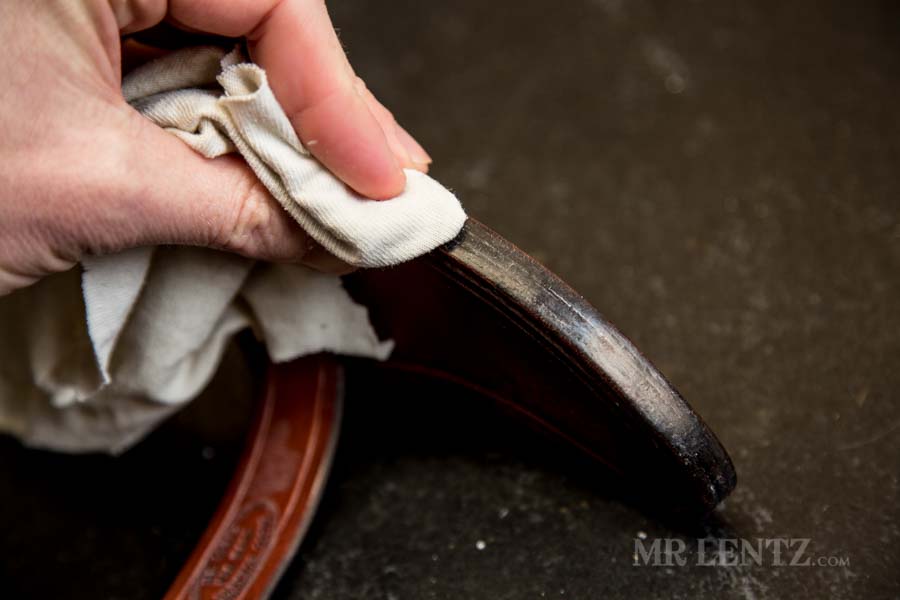
Using an old t-shirt or other soft cloth, give the edge nice gentle buff until a sheen starts to form. Now pat yourself on the back!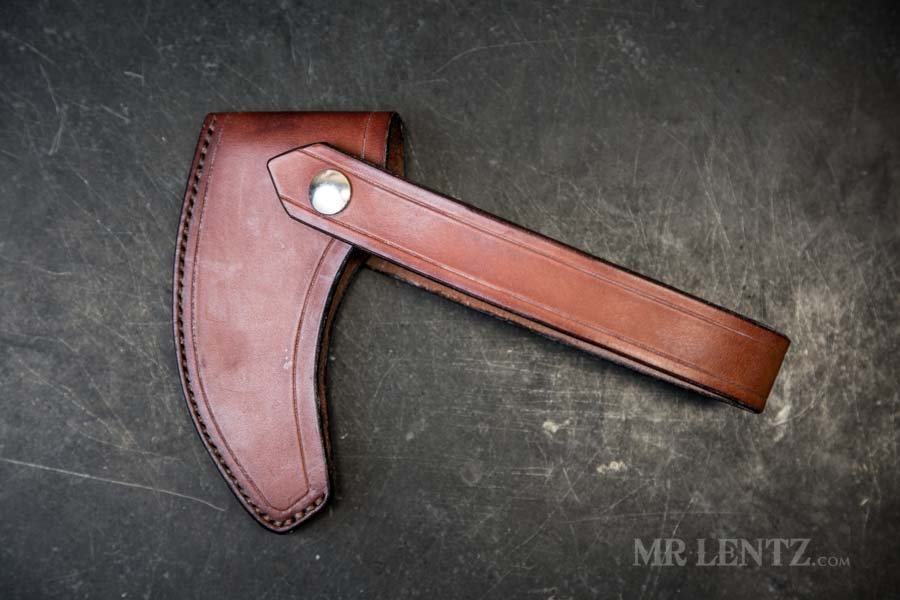
There you have it – a fully completed leather axe sheath ready to protect your axe blade.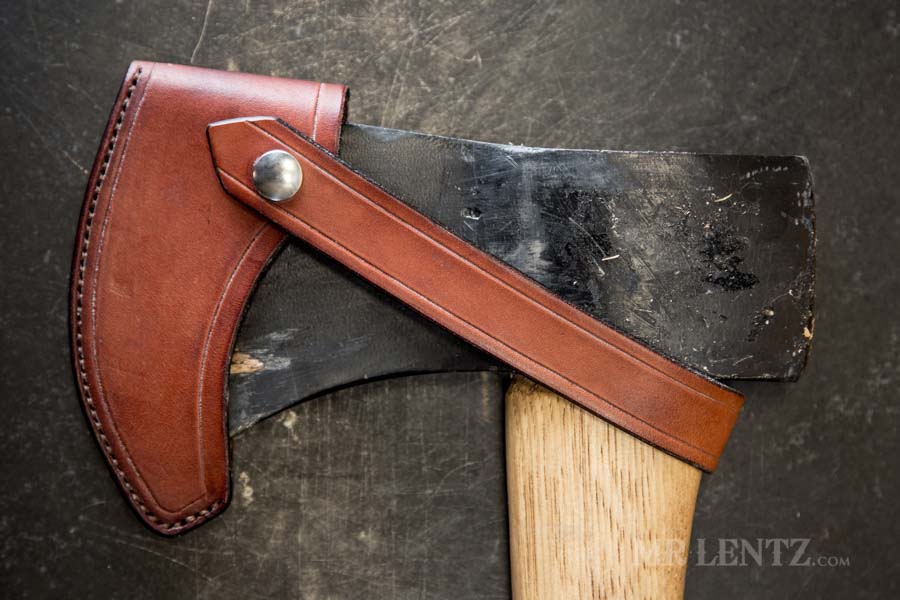
Go ahead and snap your sheath on and admire your work. It’s great to make things by hand – there’s just something great about looking at an item you made from across the room and knowing that you built it with a little elbow grease.
Well, I hope you’ve enjoyed this tutorial. If you have any questions, please submit them below in the comment box, I can usually reply within a day or so. Thank you again for visiting my site, and if you haven’t seen all the other items I make for sale…head on over to the shop and see if something strikes your fancy. Have a good day!
Like this post so far?
I spend most of my free time creating tutorials like this to help those like yourself get into leatherwork and woodworking, or get better at it. If you'd like to support my efforts, consider checking out my handmade leather goods shop and purchasing a gift for yourself or a loved one. It's readers like you that help keep a small U.S. business like mine going strong, so -thank you!
Jump to Parts 1 or 2:
Part 1 Part 2
Excellent tutorial. I learned a lot. Thank you.
Thanks Steven, glad you found it helpful!
This tutorial was, by far, the clearest and most detailed that I’ve ever read. Thank you for posting such a thorough article. I very much enjoyed following along while making my own hatchet mask.
Thanks Obi – glad you enjoyed it! If I had more time, I would definitely want to make more tutorials like this.
Thankyou so much for this. Your instuctions are so clear.
Do you do other tutorials similar for other leather products like knife sheaths
I do have a full selection of tutorials on this page here:
https://www.mrlentz.com/tutorials/
I have not made a good knife sheath tutorial yet, but it is on the radar if I ever have time to commit to it!
Dear Mr Lentz,
thanks so much for taking the time to create this tutorial.
I have now made a replacement sheath for the hatchet I have had since I was a teenager, and which my teenage son brought back home, having lost the sheath and with a new handle. It was fine when he borrowed it, I don’t like to think how he broke it. He had a useful friend fit a new handle.
I don’t have all the tools to do everything you show, and I have no good hard leather, but I was pleased to use a piece from the skin of a deer I shot. Mine is quite a soft leather compared to your nice cattle hide. However it does the job and one more part of the game kept and used.
I am not sure what beeswax would do to the whole thing, when I find some I will give it a go. Thankfully I won’t have to hunt bees for it though.
Kind Regards
Hi Blair – I am glad this tutorial was helpful for you. It’s great that you were able to use up some of your deer hide. Although as you have noticed it may be a bit too soft. You may not want to wax deer hide, but you can add a very small amount of oil to it over time to help keep the fibers from becoming brittle. Wax works better with thicker cowhide to harden it a bit. Thanks!
A great tutorial (and a superb axe sheath). Excellent step by step instructions. I hope you don’t mind a few questions (sorry if I missed information in the tutorial).
What weight maul are you using for this work? Any thoughts on round vs tapered? Would this weight also work for setting rivets and/or snaps? What size needle did you find worked best with the 1.2 mm thread? Is there any basis to determine when a welt might not be needed? Is there any leather producer that might have leather not quite as good as say Hermann Oak (leave the good stuff for more experienced folks such as yourself) but still make good sheaths? Sorry so many questions. Thank you Mike
Hi Mike – Thank you! A heavier maul is easier for punching holes – I’d suggest something around 2 pounds. I use both the round mauls and flat ones interchangeably (no tapered ones). I like the round ones a bit more for their dual use in leather carving. Make sure to get one with the tiny ridges in the head. Barry King makes great ones. This is a good all-purpose weight, but if you end up doing one job over and over with it you may find on your own that you prefer lighter or heavier depending. For 1.2mm thread you can probably get away with the John James Size 002, I sell them here too. Welts are always recommended when making sheaths for any type of blade. It helps the blade find the leather instead of your stitching. Without the welt the sharp edge may eventually work its way against the stitches. For leather for just making fun stuff like an axe sheath you can find much cheaper full-grain vegetable tanned leather on ebay if you dig around a bit, just be aware the quality can be all over the place. I think there is a vendor called The Leather Guy that has been around for quite a while and has decent listings.
Good Luck!
~Mr. Lentz
Thank you for the response- all good stuff to know.